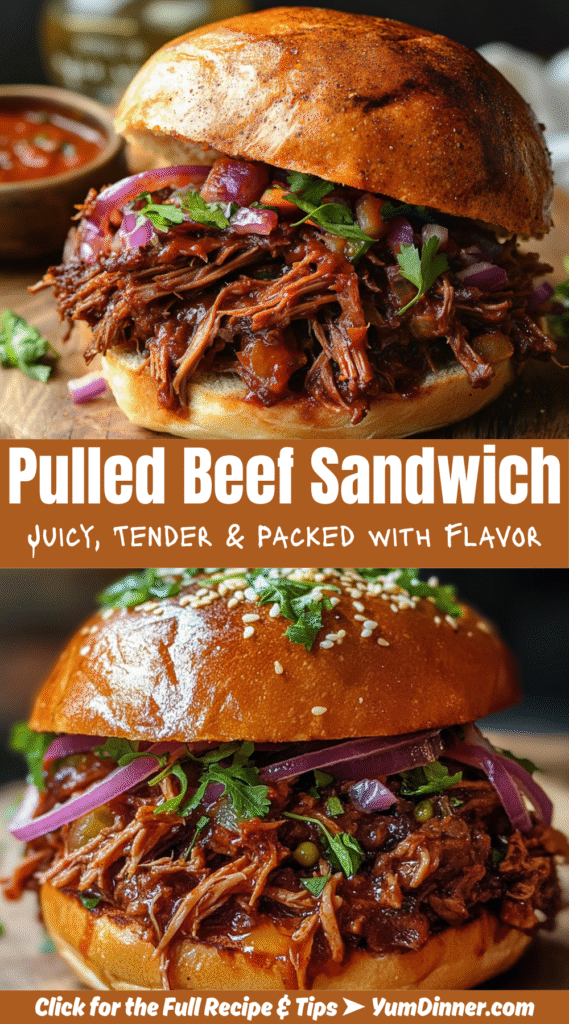
Pulled Beef Sandwich – Juicy, Tender & Packed with Flavor
I stumbled onto this recipe after getting tired of the same old chicken and turkey rotations. Don’t get me wrong—I love a good pulled chicken, but sometimes you need something with a bit more oomph, you know? This pulled beef sandwich delivers that rich, satisfying flavor that makes your taste buds do a little happy dance.
Nutrition Information
Here’s the nutritional breakdown per serving (makes 8 servings):
| Nutrient | Amount |
| Calories | 485 |
| Total Fat | 18g |
| Saturated Fat | 6g |
| Cholesterol | 125mg |
| Sodium | 890mg |
| Total Carbohydrates | 35g |
| Dietary Fiber | 2g |
| Sugars | 18g |
| Protein | 45g |
| Iron | 4.2mg |
| Potassium | 620mg |
What Makes This Pulled Beef Special?
The secret sauce here isn’t actually sauce—it’s patience and the right cut of meat. I use chuck roast because it’s got that perfect balance of fat and connective tissue that breaks down beautifully during slow cooking. Plus, it won’t break your budget like some fancier cuts might.
Ever wonder why restaurant pulled beef tastes so incredible? They’re not using magic—they’re using time and low heat to transform tough fibers into silky, tender strands. We’re basically doing the same thing, just without the industrial equipment 🙂
Ingredients You’ll Need
For the Beef:
- 4 lbs chuck roast (trimmed but leave some fat for flavor)
- 2 tablespoons brown sugar
- 2 tablespoons paprika
- 1 tablespoon garlic powder
- 1 tablespoon onion powder
- 1 tablespoon chili powder
- 2 teaspoons cumin
- 2 teaspoons salt
- 1 teaspoon black pepper
- 1 teaspoon cayenne pepper (adjust to taste)
- 2 tablespoons olive oil
For the Braising Liquid:
- 2 cups beef broth
- 1 large onion, sliced
- 4 garlic cloves, minced
- 2 tablespoons apple cider vinegar
- 2 tablespoons Worcestershire sauce
For the BBQ Sauce:
- 1 cup ketchup
- 1/2 cup apple cider vinegar
- 1/3 cup brown sugar
- 2 tablespoons molasses
- 2 tablespoons Dijon mustard
- 1 tablespoon Worcestershire sauce
- 1 teaspoon liquid smoke
- 1/2 teaspoon garlic powder
- Salt and pepper to taste
For Assembly:
- 8 brioche or potato hamburger buns
- Coleslaw (homemade or store-bought)
- Pickles (because life’s too short for sandwich without pickles)
The Magic Happens: Step-by-Step Instructions
Step 1: Create Your Flavor Foundation
First things first—let’s make that rub. Mix all the dry spices in a small bowl. I’m talking brown sugar, paprika, garlic powder, onion powder, chili powder, cumin, salt, black pepper, and cayenne. This blend is going to be your flavor powerhouse.
Pat your chuck roast completely dry with paper towels. Trust me on this—moisture is the enemy of a good sear. Rub that spice mixture all over the meat, really working it into every nook and cranny. Let it sit for at least 30 minutes, or better yet, wrap it up and let it hang out in the fridge overnight.
Step 2: Sear Like You Mean It
Heat your olive oil in a heavy Dutch oven or large oven-safe pot over medium-high heat. When it’s shimmering (but not smoking), carefully place your seasoned roast in the pot.
Here’s where patience pays off—let that baby sear for about 4-5 minutes per side without moving it around. You want a beautiful golden-brown crust on all sides. This step locks in flavor and creates those tasty fond bits that’ll make your braising liquid absolutely incredible.
Step 3: Build Your Braising Base
Remove the seared roast and set it aside. In the same pot (don’t you dare clean it!), add your sliced onions. Cook them for about 5 minutes until they start to soften and pick up those lovely browned bits from the bottom of the pot.
Add the minced garlic and cook for another minute until fragrant. Pour in the beef broth, apple cider vinegar, and Worcestershire sauce. Use a wooden spoon to scrape up all those flavor gems stuck to the bottom—that’s liquid gold right there.
Step 4: The Long, Slow Dance
Preheat your oven to 325°F. Return the seared beef to the pot, nestling it into that aromatic braising liquid. The liquid should come about halfway up the sides of the roast—add more broth if needed.
Cover tightly with a lid (or foil if your pot doesn’t have one) and slide it into the oven. Now comes the hard part—waiting. This baby needs about 3-4 hours to transform from tough to tender.
How do you know it’s ready? The meat should shred easily with a fork. If it’s still putting up a fight, give it another 30 minutes. Better to wait than to rush perfection, right?
Step 5: Sauce Time
While your beef is doing its thing, let’s whip up that BBQ sauce. Combine ketchup, apple cider vinegar, brown sugar, molasses, Dijon mustard, Worcestershire sauce, liquid smoke, and garlic powder in a medium saucepan.
Bring it to a gentle simmer over medium heat, stirring occasionally. Let it bubble away for about 10-15 minutes until it thickens slightly. Taste and adjust—maybe you want more tang? Add vinegar. Sweeter? More brown sugar. This is your sauce, make it work for you.
The Shredding Ceremony
Once your beef passes the fork test, carefully remove it from the pot and let it rest for about 10 minutes. Meanwhile, strain that braising liquid—you’ll want to save about a cup of it.
Now for the fun part: shredding. Use two forks to pull the meat apart along the grain. It should come apart easily, creating those perfect pulled beef strands we’re after. If you hit any stubborn bits of fat or gristle, just toss them.
Bringing It All Together
Mix your shredded beef with about 3/4 of your homemade BBQ sauce. Add a splash of that reserved braising liquid if the mixture seems too dry. You want it moist but not swimming in sauce—the meat should be the star here.
Taste and adjust the seasoning. Sometimes I add a pinch more salt or a squeeze of fresh lime juice to brighten things up. FYI, this is where you can really make it your own.
Assembly: The Grand Finale
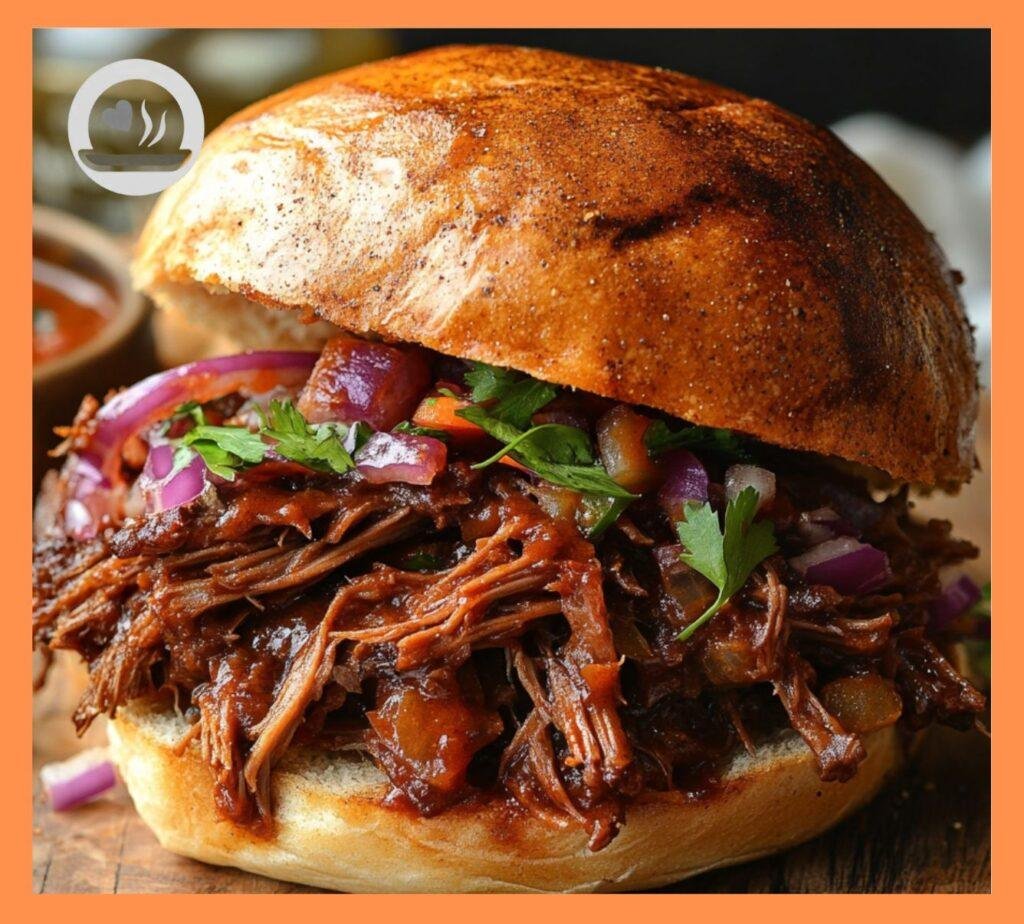
Toast your buns lightly—nobody wants a soggy sandwich bottom. Pile that gorgeous pulled beef high on the bottom bun, top with a generous scoop of coleslaw for crunch and freshness, add a few pickle slices, and crown it with the top bun.
Pro Tips from Someone Who’s Made This Way Too Many Times
Double-check your chuck roast at the store. You want good marbling but not excessive fat caps. Ask your butcher to trim it if needed—they’re usually happy to help.
The rub can be made days ahead and stored in an airtight container. I actually prefer making big batches and keeping it handy for whenever the pulled beef craving strikes.
Leftover pulled beef freezes beautifully for up to 3 months. Just thaw, reheat gently with a splash of broth, and you’re back in business.
Don’t skip the searing step, even if you’re tempted. Those caramelized flavors are non-negotiable for restaurant-quality results at home.
Make-Ahead Magic
Here’s something I learned the hard way—this dish actually gets better with time. Make the pulled beef a day ahead, let it cool completely, then refrigerate. The flavors meld and deepen overnight, creating an even more complex taste.
When you’re ready to serve, gently reheat in a covered pot with a splash of broth or braising liquid. Keep it low and slow to prevent drying out.
Serving Suggestions That’ll Blow Your Mind
Sure, sandwiches are classic, but think outside the bun sometimes. I’ve served this pulled beef over:
- Loaded baked sweet potatoes with a dollop of Greek yogurt
- Crispy cornbread for a Southern twist
- Mac and cheese for the ultimate comfort food mashup
- Flour tortillas with all the taco fixings
The Bottom Line
This pulled beef sandwich isn’t just food—it’s an experience. The combination of that perfectly spiced, tender meat with tangy BBQ sauce and crisp coleslaw creates a flavor profile that hits every note your taste buds are craving.
I’ve served this at backyard gatherings, family dinners, and even fancy dinner parties (yes, really). Every single time, people ask for the recipe. Now you’ve got it, and honestly, you’re going to become the go-to person for comfort food in your circle.
The best part? Once you master this technique, you can experiment with different spice blends, sauces, and serving styles. But fair warning—you might become a little obsessed with perfecting your pulled beef game.
Trust me, there are worse problems to have :/
Go ahead, fire up that oven and get ready to create some seriously impressive sandwiches. Your future self (and everyone you feed) will thank you for it.