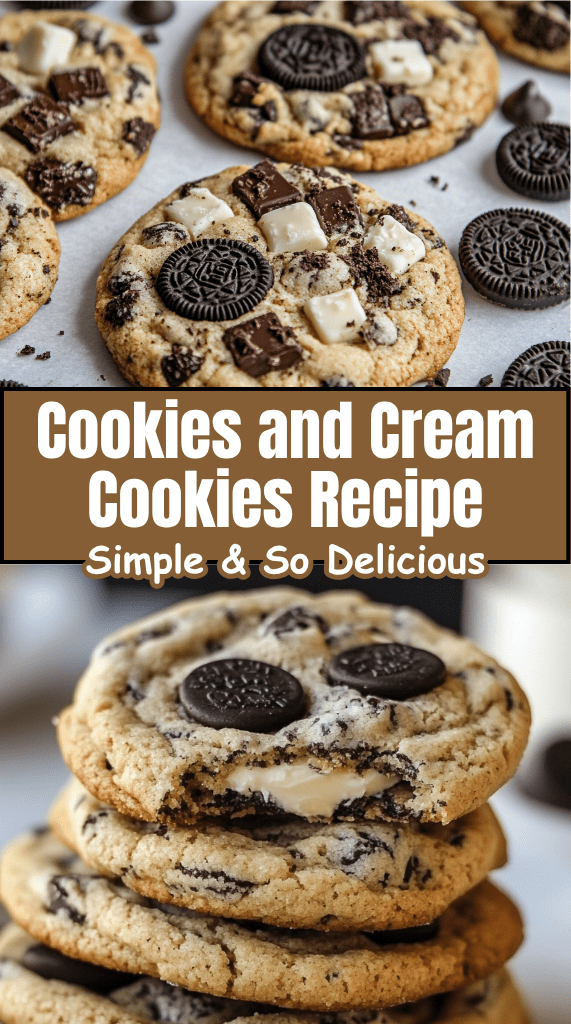
How to Make Cookies and Cream Cookies – Simple & So Delicious
Look, I’ll be straight with you—cookies and cream cookies are basically the dessert equivalent of wearing socks with sandals. Sounds weird at first, but once you try them, you’ll wonder why you ever lived without them. These aren’t your grandma’s sugar cookies (though I’m sure she’d approve). We’re talking about soft, chewy cookies loaded with crushed chocolate sandwich cookies that’ll make your taste buds do a happy dance.
I stumbled onto this recipe during one of those late-night baking sessions when I had a serious sweet tooth and a pantry full of random ingredients. Ever wondered what happens when you throw caution to the wind and crush up a sleeve of chocolate cookies into cookie dough? Pure magic, that’s what! 🙂
Nutrition Information
| Nutrient | Per Cookie (makes 24) |
| Calories | 185 |
| Total Fat | 8g |
| Saturated Fat | 4g |
| Cholesterol | 25mg |
| Sodium | 120mg |
| Total Carbohydrates | 28g |
| Dietary Fiber | 1g |
| Sugars | 18g |
| Protein | 3g |
What Makes These Cookies So Addictive?
The secret lies in the contrast of textures. You’ve got the soft, buttery cookie base that melts in your mouth, punctuated by crunchy bits of chocolate sandwich cookies. It’s like eating a cookie while eating a cookie—meta, right?
I’ve made these for countless gatherings, and trust me, they disappear faster than free samples at Costco. People always ask for the recipe, and honestly, I used to guard it like a state secret. But life’s too short not to share good cookies!
Ingredients You’ll Need
For the Cookie Base:
- 1 cup (2 sticks) unsalted butter, softened
- ¾ cup granulated sugar
- ¾ cup packed light brown sugar
- 2 large eggs
- 2 teaspoons vanilla extract
- 2¼ cups all-purpose flour
- 1 teaspoon baking soda
- 1 teaspoon salt
For the Cookies and Cream Magic:
- 20 chocolate sandwich cookies (like Oreos), roughly crushed
- ½ cup white chocolate chips (optional, but highly recommended)
Step-by-Step Instructions
Getting Started: The Foundation
Step 1: Prep Your Kitchen Preheat your oven to 375°F (190°C). Line two baking sheets with parchment paper. Trust me on the parchment paper—it’s the difference between cookies that slide off easily and cookies that become one with your pan. Nobody wants that drama.
Step 2: Cream the Butter and Sugars In a large mixing bowl, cream together the softened butter, granulated sugar, and brown sugar until the mixture looks light and fluffy. This usually takes about 3-4 minutes with an electric mixer. Don’t rush this step—proper creaming creates those perfect air pockets that make cookies tender.
Building the Flavor Profile
Step 3: Add the Wet Ingredients Beat in the eggs one at a time, then add the vanilla extract. Mix until everything comes together nicely. The mixture might look a bit lumpy at this point, but that’s totally normal.
Step 4: Combine the Dry Ingredients In a separate bowl, whisk together the flour, baking soda, and salt. I know it seems like an extra step, but this ensures even distribution of the leavening agents. Nobody wants a cookie that’s fluffy on one side and flat on the other!
Step 5: Bring It All Together Gradually add the flour mixture to the butter mixture, mixing on low speed until just combined. Don’t overmix—this isn’t bread dough. We want tender cookies, not hockey pucks.
The Star of the Show: Adding the Cookies
Step 6: Crush Those Cookies Here’s where the fun begins! Place your chocolate sandwich cookies in a large zip-lock bag and crush them with a rolling pin. Aim for chunky pieces, not powder. You want some bigger chunks for texture and some smaller pieces to distribute throughout the dough.
Step 7: Fold in the Good Stuff Gently fold the crushed cookies and white chocolate chips (if using) into the dough. Use a wooden spoon or spatula—your hands work too, but fair warning: you’ll definitely “quality test” more dough than you intended. 🙂
Baking to Perfection
Step 8: Shape and Space Scoop the dough into 2-inch balls and place them about 2 inches apart on your prepared baking sheets. These cookies will spread, so give them room to breathe. I use a cookie scoop for consistent sizing, but a spoon works just fine.
Step 9: Bake Until Golden Bake for 9-11 minutes, or until the edges are lightly golden brown. The centers might look slightly underdone—that’s perfect! They’ll continue cooking on the hot pan after you remove them from the oven.
Step 10: Cool and Enjoy Let the cookies cool on the baking sheet for 5 minutes, then transfer them to a wire rack. This cooling time is crucial—it lets the cookies set up properly without becoming crispy.
Pro Tips That’ll Make You Look Like a Baking Genius
Temperature Matters
Room temperature ingredients mix better and create a more uniform texture. Pull your eggs and butter out about an hour before baking. Forgot to do this? No worries—you can soften butter quickly by cutting it into small pieces.
The Crush Factor
Don’t pulverize those sandwich cookies into dust! You want visible chunks in your finished cookies. Think of it as edible confetti that actually tastes good.
Storage Solutions
These cookies stay fresh for up to a week in an airtight container. Pro tip: throw a slice of bread in the container to keep them soft. The bread goes stale, but your cookies stay perfect. It’s like a delicious sacrifice!
Troubleshooting Common Issues
My Cookies Are Too Flat
This usually happens when your butter is too warm or you’ve overmixed the dough. Chill your dough for 30 minutes before baking if this happens.
My Cookies Are Too Thick
Not enough butter or too much flour can cause this. Make sure you’re measuring flour correctly—spoon it into the measuring cup and level it off.
The Cookie Pieces Disappeared
If your sandwich cookie pieces seem to vanish during baking, they might have been crushed too fine. Bigger chunks hold up better to the heat.
Variations That’ll Keep Things Interesting
Birthday Cake Edition
Replace the chocolate sandwich cookies with vanilla sandwich cookies and add colorful sprinkles. It’s like a party in cookie form!
Double Chocolate Madness
Use chocolate sandwich cookies and add cocoa powder to the base dough. For when regular chocolate isn’t chocolatey enough.
Seasonal Twists
Swap out the sandwich cookies for seasonal varieties—pumpkin spice cookies in fall, or mint chocolate cookies during the holidays.
The Science Behind the Magic
Ever wondered why these cookies work so well? The fat content in the sandwich cookies adds richness, while the cocoa in the cookie pieces provides a slight bitter contrast to the sweet cookie base. The different textures create what food scientists call “mouthfeel complexity”—fancy talk for “really satisfying to eat.”
The brown sugar in the base adds moisture and chewiness, while the white sugar helps with spread and creates those slightly crispy edges. It’s like a perfectly orchestrated symphony, except instead of music, you get cookies.
Why This Recipe Works Every Time
I’ve tested this recipe more times than I care to admit (okay, maybe I do care—it was delicious research). The key is the balance of ingredients and the gentle handling of the dough. Unlike some finicky recipes that require precise measurements and perfect timing, this one is pretty forgiving.
The sandwich cookie pieces don’t just add flavor—they also provide structure and prevent the cookies from spreading too much. It’s like they’re doing double duty, which IMO is exactly what you want in a cookie ingredient.
Final Thoughts: Cookie Perfection Achieved
These cookies and cream cookies aren’t just dessert—they’re a conversation starter, a mood booster, and quite possibly the answer to world peace (okay, maybe not that last one, but they’re pretty great). They’re fancy enough for a dinner party but simple enough for a Tuesday night when you need something sweet.
The best part? You probably have most of these ingredients in your kitchen right now. So what are you waiting for? Your taste buds are calling, and trust me, you want to answer that call. These cookies are about to become your new favorite baking project, and honestly, your friends and family will thank you for it.
Now go forth and bake—your kitchen is about to smell absolutely amazing!

