Easy Cheesy Chicken Garlic Bread Sandwich You’ll Crave Daily
Sometimes the best recipes happen when you’re standing in your kitchen at 9 PM, staring at random leftovers and thinking, “What if I just… combined all of this?” That’s exactly how this cheesy chicken garlic bread sandwich was born – part desperation, part genius, and 100% delicious.
I had leftover grilled chicken, some day-old bread that needed rescuing, and a serious craving for something indulgent. Three attempts later, I’d created what my family now calls “the sandwich that ruined all other sandwiches” – and honestly, they’re not wrong.
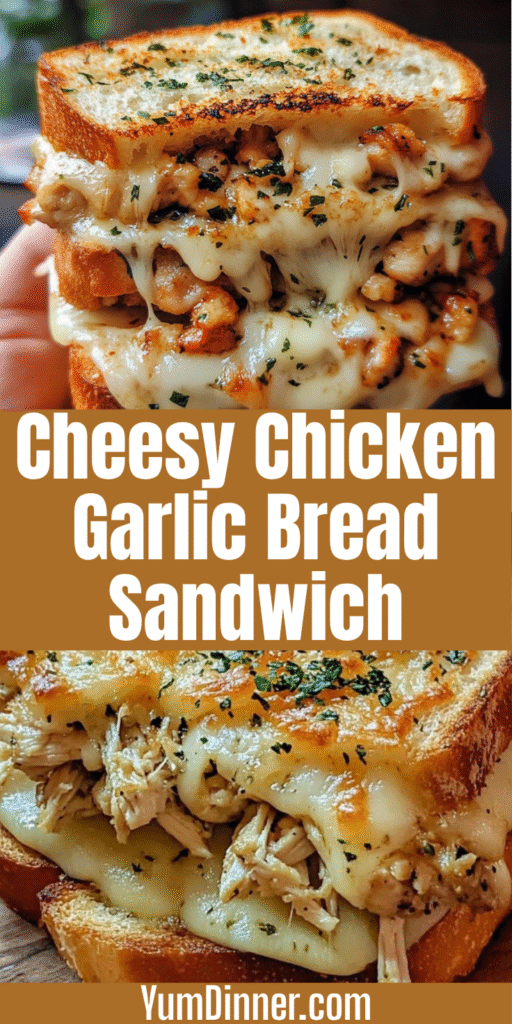
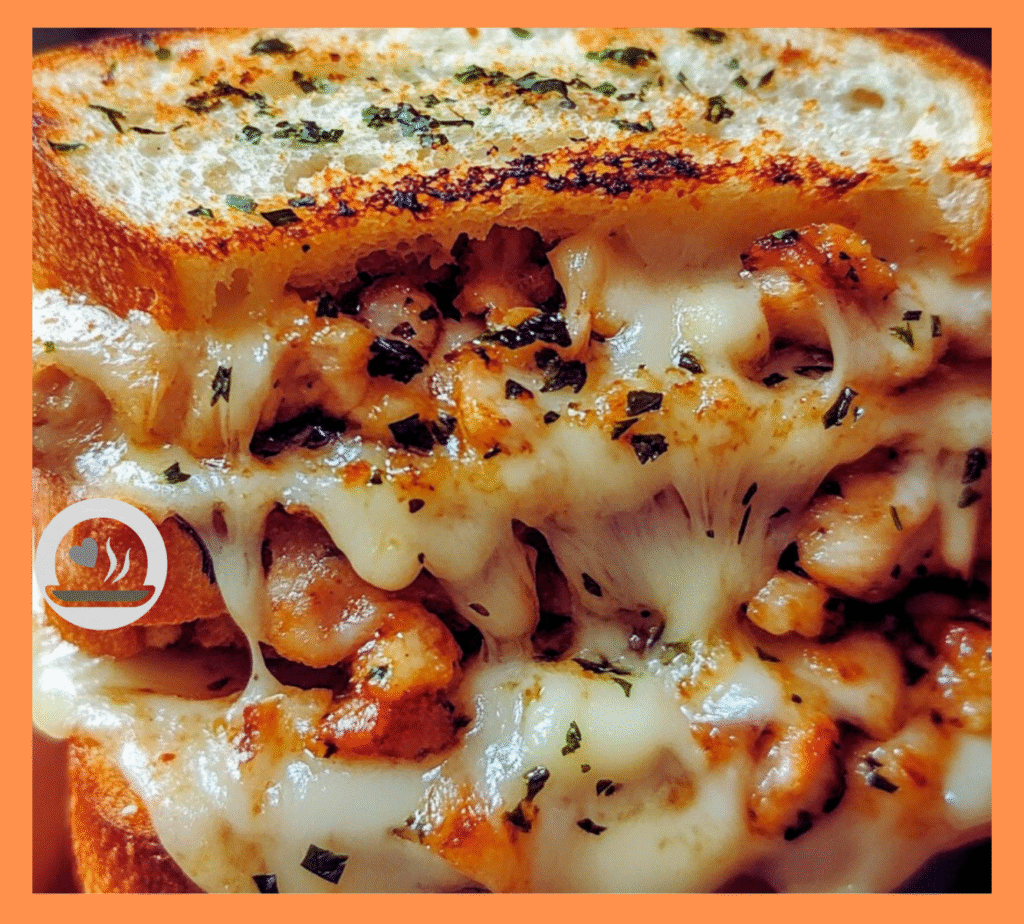
This isn’t your average lunch meat situation. We’re talking about buttery, garlicky bread that’s been transformed into the ultimate sandwich vessel, stuffed with seasoned chicken and enough melted cheese to make you question your life choices (in the best possible way).
Why This Sandwich Hits Different
Regular sandwiches are fine, but they’re missing that special something that makes you actually excited about lunch. This cheesy chicken garlic bread sandwich solves that problem by turning garlic bread – already perfect on its own – into the bread component of an epic sandwich.
The magic happens when the garlic butter soaks into the bread while the cheese melts and the chicken gets all warm and savory. Every bite delivers layers of flavor and texture that regular bread just can’t compete with.
Plus, it’s one of those recipes that looks way more complicated than it actually is. Your guests will think you’re some kind of culinary wizard when really, you just assembled some ingredients and let heat do the heavy lifting.
Complete Ingredients List
The Bread Foundation
- 1 large French bread loaf (or Italian bread)
- 6 tablespoons butter, softened
- 4 cloves garlic, minced
- 2 tablespoons fresh parsley, chopped
- 1/4 teaspoon garlic powder
- Pinch of salt
The Chicken Component
- 2 cups cooked chicken, shredded or diced
- 1/4 cup mayonnaise
- 1 teaspoon Italian seasoning
- 1/2 teaspoon garlic powder
- 1/2 teaspoon onion powder
- Salt and black pepper to taste
- 2 tablespoons olive oil (if cooking raw chicken)
The Cheese Situation
- 1.5 cups mozzarella cheese, shredded
- 1/2 cup cheddar cheese, shredded
- 1/4 cup Parmesan cheese, grated
The Flavor Boosters
- 2 medium tomatoes, sliced
- 1/2 red onion, thinly sliced (optional)
- 4-6 fresh basil leaves
- 2 tablespoons balsamic glaze (optional)
- Red pepper flakes to taste
Step-by-Step Assembly Method
Phase One: The Garlic Bread Prep
Start by preheating your oven to 400°F – this temperature gives us the perfect balance of melted cheese and golden bread without burning anything.
Mix the garlic butter like your life depends on it. Combine softened butter, minced garlic, chopped parsley, garlic powder, and a pinch of salt in a bowl. The mixture should be smooth and fragrant. If your butter isn’t soft enough, microwave it for 10-15 seconds, but don’t let it melt completely.
Cut your French bread lengthwise, creating two long halves. Spread the garlic butter generously on both cut sides – don’t be shy here. The butter should reach almost to the edges because it’s going to soak in and create that incredible flavor base.
Phase Two: Chicken Preparation Magic
If you’re using leftover chicken, lucky you – half the work is done. Shred or dice it into bite-sized pieces and toss with mayonnaise, Italian seasoning, garlic powder, onion powder, salt, and pepper. The mayo isn’t just for moisture; it helps all the seasonings stick to the chicken.
Starting with raw chicken? Season chicken breasts with salt, pepper, and garlic powder, then cook in olive oil over medium-high heat for 6-7 minutes per side until fully cooked. Let it rest for 5 minutes before dicing. The resting time keeps all those juices from running out when you cut it.
Phase Three: The Assembly Line
Here’s where things get exciting. Layer the seasoned chicken evenly over both halves of the garlic bread. Don’t pile it too thick in some spots and leave other areas bare – even distribution means every bite is perfect.
Add your tomato slices and red onion if you’re using them. Pat the tomatoes dry with paper towels first – excess moisture can make your bread soggy, and nobody wants that.
Now for the cheese finale: sprinkle the mozzarella first, then the cheddar, and finish with Parmesan. The mozzarella melts beautifully and creates stretch, the cheddar adds sharp flavor, and the Parmesan gives that nutty, salty finish that makes everything taste more expensive.
Phase Four: The Melting Transformation
Place both halves on a large baking sheet and slide them into your preheated oven. Bake for 12-15 minutes until the cheese is melted and bubbly and the edges of the bread are golden brown.
You want to see some actual browning on the cheese – that’s where the best flavor develops. If your cheese isn’t browning after 15 minutes, turn on the broiler for the last 2-3 minutes, but watch it like a hawk.
Pro Tips That Elevate Everything
Bread Selection Strategy
Day-old bread actually works better than fresh because it’s slightly dried out and won’t get soggy from the garlic butter and chicken moisture. Fresh bread can work, but you might want to toast it lightly first.
French bread provides the ideal ratio of crusty exterior to soft interior. Italian bread works too, but avoid anything too dense or it won’t heat through properly.
Chicken Texture Secrets
Shredded chicken holds seasonings better than diced, but diced chicken provides more distinct texture. I usually go with a combination – mostly shredded with some larger chunks for variety.
Ever wonder why restaurant chicken always tastes more flavorful? They season it while it’s still warm. Add your seasonings to chicken that’s just been cooked for maximum flavor absorption.
Cheese Melting Science
Room temperature cheese melts more evenly than cold cheese straight from the fridge. Pull your cheese out 15-20 minutes before assembling if you remember (though let’s be honest, who actually plans that far ahead?).
The three-cheese combination isn’t just for show – each type contributes something different. Mozzarella melts smoothly, cheddar provides sharp flavor, and Parmesan adds complexity and helps everything brown beautifully.
Customization Options That Actually Work
Spice Level Adjustments
This recipe is pretty mild as written, making it family-friendly. For heat, add sliced jalapeños or banana peppers before the cheese layer. A drizzle of hot sauce mixed into the chicken mixture also works perfectly.
Red pepper flakes sprinkled over the cheese before baking adds just enough heat without overwhelming the other flavors.
Vegetable Additions
Roasted red peppers, sun-dried tomatoes, or sautéed mushrooms all play well with the existing flavors. Add them with the tomato layer for best results.
Spinach works too, but sauté it first to remove excess moisture. Raw spinach can make your sandwich watery and nobody wants that disappointment.
Sauce Upgrades
A light spread of pesto or marinara sauce on the bread before adding chicken creates another flavor layer. Don’t go overboard – you want enhancement, not a sauce explosion that makes everything messy.
Balsamic glaze drizzled over the finished sandwich adds a tangy-sweet element that’s surprisingly sophisticated.
Common Mistakes and How to Avoid Them
The Soggy Bread Disaster
This happens when you use too much garlic butter or don’t pat your tomatoes dry. Use enough butter for flavor but not so much that it pools in the bread crevices. The bread should be moist, not saturated.
Always, always pat tomatoes dry before layering them on. Those seeds and juice will turn your beautiful garlic bread into a soggy mess.
Uneven Heating Problems
Don’t pile all the chicken in the center – spread it evenly across the entire surface. Thick spots won’t heat through properly while thin spots might dry out.
If your oven heats unevenly, rotate the baking sheet halfway through cooking. Most home ovens have hot spots that can cause uneven browning.
Cheese Catastrophes
Pre-shredded cheese doesn’t melt as smoothly as freshly shredded because of anti-caking agents. It’s worth the extra few minutes to shred your own for the best results.
Adding cheese to hot ingredients can cause it to seize up and become grainy. Let your chicken cool slightly before assembly if you’re working with just-cooked meat.
Make-Ahead and Storage Solutions
Prep-Ahead Strategies
The garlic butter can be made days in advance and stored in the refrigerator. It actually improves as the flavors meld together. Just bring it back to room temperature before using.
You can also season your chicken ahead of time. Cooked, seasoned chicken keeps well in the fridge for 3-4 days and actually tastes better after the flavors have had time to develop.
Leftover Management
These sandwiches reheat surprisingly well if you do it right. Wrap individual portions in foil and warm in a 350°F oven for 10-12 minutes. The foil prevents the bread from getting too crispy while ensuring the inside heats through.
Microwave reheating works for the filling, but you’ll lose that crispy bread texture that makes this sandwich special.
Serving Suggestions and Pairings
What Complements This Indulgence
A light, crisp salad with vinaigrette cuts through all that rich, cheesy goodness perfectly. I love a simple arugula salad with lemon dressing – the peppery greens and bright acid balance the sandwich beautifully.
Pickle spears or chips provide that tangy crunch that makes every bite more interesting. The acidity helps cleanse your palate between bites of all that cheese and garlic.
Portion Considerations
One half of a French bread loaf easily serves 2-3 people as a main course, or 4-6 people as an appetizer. This is rich, filling food – a little goes a long way.
Cut into smaller portions for a party appetizer, or keep the halves whole for a satisfying dinner with soup or salad.
Troubleshooting Your Sandwich Success
When Assembly Goes Wrong
Bread falling apart during assembly? Your bread might be too fresh and soft. Let it sit out for an hour to firm up, or toast it lightly before adding toppings.
Chicken sliding off the bread? The mayonnaise mixture should help it stick, but you can also press it gently into the garlic butter before adding cheese.
Temperature and Timing Issues
Cheese not melting evenly? Your oven temperature might be off, or you need to rotate the pan. Every oven is different – adjust cooking time based on what you see, not just the timer.
Edges burning before cheese melts? Lower your oven temperature to 375°F and cook a bit longer. Better to go slow than end up with burnt bread and cold centers.
Why This Recipe Deserves a Permanent Spot
This cheesy chicken garlic bread sandwich represents everything I love about creative cooking – taking familiar ingredients and combining them in ways that create something completely new and exciting. It’s comfort food that doesn’t apologize for being indulgent.
The best part? Once you master the basic technique, you can customize it endlessly. Different cheeses, various seasonings, alternative proteins – the garlic bread foundation works with almost anything you throw at it.
I’ve served this at casual family dinners and game day parties, and it never fails to get people talking. There’s something about the combination of garlic bread and sandwich that just makes people happy.
The next time you’re looking for something that’s more exciting than a regular sandwich but not as complicated as a full cooking project, give this recipe a try. Your taste buds will thank you, and you might just discover your new favorite way to use leftover chicken. FYI, you might want to make extra – people have been known to fight over the last piece! 🙂