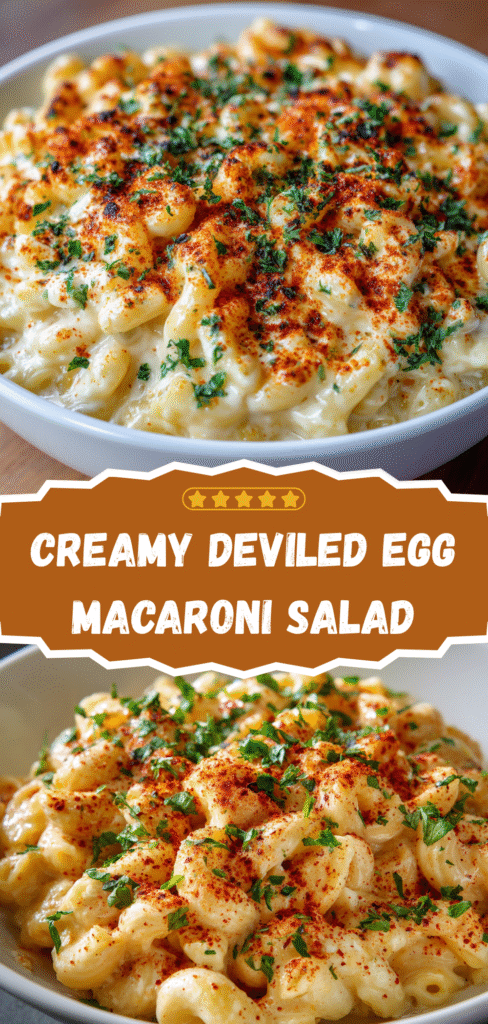
Creamy Deviled Egg Macaroni Salad – So Flavorful!
You know that moment at a potluck when someone brings a dish so good it disappears before you even get a chance to try it? This Creamy Deviled Egg Macaroni Salad is exactly that dish. It’s like someone took the best parts of classic deviled eggs and had them crash into traditional macaroni salad, creating this beautiful, chaotic mashup that somehow works better than either dish on its own.
I stumbled across this recipe during a particularly stressful Fourth of July prep when I couldn’t decide between making deviled eggs or macaroni salad for our family gathering. My solution? Why not both? After some experimental kitchen chaos and one minor mayonnaise emergency, I created what my nephew now calls “the good salad” – you know, the one he actually asks for seconds of instead of hiding under his napkin.
The genius lies in combining the tangy, creamy richness of deviled egg filling with perfectly cooked pasta and crunchy vegetables. It’s comfort food that travels well, tastes better the next day, and somehow manages to please both the mayo lovers and the people who claim they “don’t really like pasta salad” (spoiler alert: they love this one).
Nutritional Information (Per Serving – Makes 10 servings)
| Nutrient | Amount | % Daily Value |
| Calories | 380 | 19% |
| Total Fat | 24g | 31% |
| Saturated Fat | 5g | 25% |
| Cholesterol | 145mg | 48% |
| Sodium | 590mg | 26% |
| Total Carbs | 32g | 12% |
| Dietary Fiber | 2g | 7% |
| Sugars | 4g | – |
| Protein | 12g | 24% |
| Vitamin A | 180mcg | 20% |
| Vitamin C | 8mg | 9% |
| Calcium | 85mg | 7% |
| Iron | 2.1mg | 12% |
Why This Salad Will Ruin All Other Pasta Salads for You
Here’s what makes this different from every soggy, bland pasta salad you’ve ever endured at a church potluck: the dressing is actually built for flavor, not just to hold things together. We’re using the classic deviled egg formula – mayo, mustard, a touch of vinegar, and seasonings – but applying it to pasta with the perfect supporting cast of ingredients.
The hard-boiled eggs aren’t just thrown in as an afterthought; they’re the star of the show, providing protein, richness, and that classic deviled egg flavor that makes people go “mmm” on the first bite. Combined with perfectly cooked elbow macaroni and just enough crunch from celery and onions, this salad hits every texture and flavor note you want in a side dish.
Ever wonder why some pasta salads taste amazing fresh but turn into disappointing mush the next day? This one actually gets better as it sits because the pasta absorbs the flavors without getting soggy, thanks to the perfect pasta-to-dressing ratio.
Ingredients That Create Pure Picnic Magic
For the Pasta Base:
- 1 pound elbow macaroni (or small shells work great too)
- 8 large eggs
- 2 tablespoons salt (for the pasta water)
- 1 tablespoon olive oil
For the Deviled Egg Dressing:
- 3/4 cup mayonnaise (use the good stuff, trust me)
- 1/4 cup sour cream
- 2 tablespoons yellow mustard
- 1 tablespoon Dijon mustard
- 2 tablespoons apple cider vinegar
- 1 tablespoon sugar
- 1 teaspoon garlic powder
- 1 teaspoon onion powder
- 1/2 teaspoon smoked paprika
- 1/2 teaspoon salt
- 1/4 teaspoon black pepper
- 1/4 teaspoon cayenne pepper (optional, but it adds a nice kick)
For the Mix-Ins:
- 3 celery stalks, finely diced
- 1/2 medium red onion, finely diced
- 1/4 cup fresh chives, chopped
- 2 tablespoons fresh dill, chopped
- 1/2 cup sweet pickle relish (drain it well!)
For the Finishing Touch:
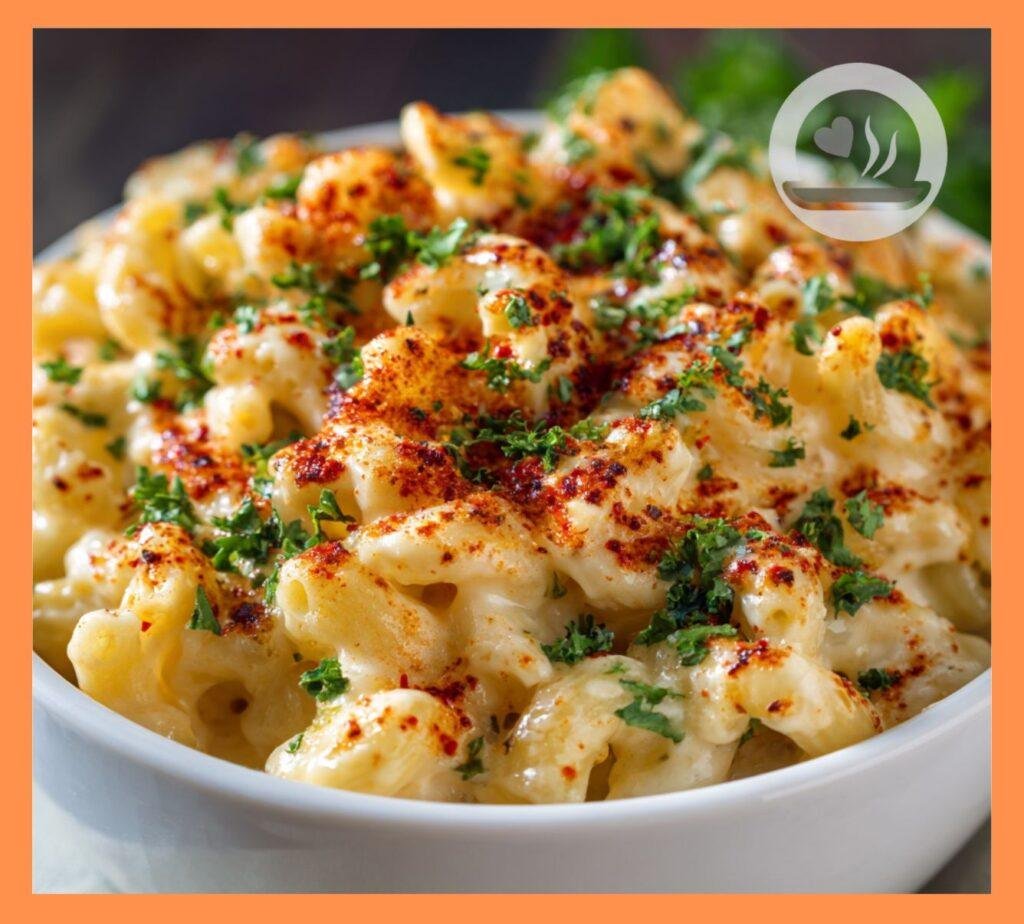
- 1/2 teaspoon smoked paprika (for sprinkling)
- Extra fresh chives for garnish
- A few extra hard-boiled egg slices (because presentation matters)
Step-by-Step Instructions (Don’t Skip the Details!)
Step 1: Master the Perfect Hard-Boiled Eggs
Start with your eggs because they need time to cool completely. Place 8 eggs in a large saucepan and cover with cold water by about an inch. Bring to a rolling boil, then immediately remove from heat and cover.
Let them sit for exactly 12 minutes – set a timer because precision matters here. After 12 minutes, transfer them to an ice bath to stop the cooking process. This method gives you perfectly cooked eggs with bright yellow yolks and no weird green ring.
Once they’re completely cool (about 15 minutes), peel them carefully. Pro tip: Older eggs peel easier than super fresh ones, so if you’re planning ahead, buy your eggs a week before you need them.
Step 2: Cook Pasta Like You Actually Care About It
Bring a large pot of water to a rolling boil and add the salt – the water should taste like mild seawater. Add the macaroni and cook according to package directions until al dente. We want the pasta to have a slight bite because it’ll continue to soften as it absorbs the dressing.
Drain the pasta and rinse with cold water until it’s completely cool. Toss with olive oil to prevent sticking – this step prevents that gross, clumpy pasta situation that ruins everything.
Step 3: Create the Ultimate Deviled Egg Dressing
While your pasta cools, whisk together mayonnaise, sour cream, both mustards, apple cider vinegar, and sugar in a large bowl. The sugar balances the tanginess and creates that perfect deviled egg flavor profile.
Add the garlic powder, onion powder, smoked paprika, salt, pepper, and cayenne (if using). Whisk until completely smooth and taste for seasoning. This dressing should be bold and flavorful because it needs to coat a lot of pasta and ingredients.
Step 4: Prep Your Supporting Cast
Finely dice the celery and red onion – and I mean finely. Nobody wants to bite into a huge chunk of raw onion in their pasta salad. The pieces should be small enough to distribute evenly but large enough to provide texture.
Chop your fresh herbs and drain that pickle relish really well. Excess pickle juice will thin out your dressing and make everything watery, which is the enemy of good pasta salad.
Step 5: The Egg Situation (This Is Where Magic Happens)
Here’s where this recipe gets interesting. Take 6 of your hard-boiled eggs and chop them roughly – think chunky deviled egg texture, not tiny pieces. These will distribute throughout the salad and provide that classic deviled egg experience in every bite.
Reserve the remaining 2 eggs for slicing and garnishing the top. Trust me on this – presentation matters, and those perfect egg slices on top scream “I know what I’m doing in the kitchen.”
Step 6: Bring It All Together
Add the cooled pasta to your dressing and toss until every piece is well coated. Add the chopped eggs, celery, red onion, chives, dill, and pickle relish. Fold everything together gently – we want to combine without mashing those beautiful egg pieces.
Taste and adjust seasoning. You might need more salt, a touch more vinegar for tang, or additional herbs for freshness. This is your chance to make it perfect for your taste preferences.
Step 7: The Patience Game (Worth Every Minute)
Transfer the salad to a serving bowl and smooth the top. Arrange those reserved egg slices on top in an attractive pattern, then sprinkle with smoked paprika and extra chives.
Cover and refrigerate for at least 2 hours, but preferably overnight. This resting time allows all the flavors to meld together and creates that perfect creamy consistency we’re after.
Why This Recipe Works Every Single Time
The success of this salad lies in the perfect balance of creamy, tangy, and crunchy elements. The deviled egg dressing provides richness without being heavy, while the combination of mustards adds complexity that keeps each bite interesting.
The texture contrast is everything – creamy pasta and eggs, crunchy celery and onion, and those little pops of sweetness from the pickle relish. Each component has a purpose and contributes to the overall experience.
Most importantly, the flavor actually develops as it sits, unlike many pasta salads that peak immediately and go downhill from there. The pasta absorbs the dressing gradually, creating deeper, more integrated flavors over time.
Pro Tips That Separate Good Cooks from Great Ones
Don’t overcook the pasta: Al dente is crucial because the pasta will continue to soften as it absorbs the dressing. Mushy pasta equals disappointing salad, and life’s too short for disappointing food.
Season the pasta water generously: This is your only chance to season the pasta itself. Under-seasoned pasta water leads to bland pasta, and no amount of dressing can fix that mistake.
Drain the pickle relish: I cannot stress this enough. Squeeze it in a clean kitchen towel if you have to, but get that excess liquid out. Watery dressing is the death of good pasta salad.
Make it ahead: This salad is actually better the next day. The flavors meld, the texture improves, and you look like a planning genius. Win-win-win.
Variations That Keep Things Interesting
Want to mix things up? Try adding crispy bacon bits for a loaded deviled egg vibe that’ll make people question everything they thought they knew about pasta salad. Cook 6-8 strips until crispy, chop them up, and fold them in just before serving.
For a fresh summer twist, add cherry tomatoes and cucumber. The tomatoes add sweetness and acidity, while cucumber brings that crisp freshness that makes everything feel lighter.
Cheese lovers can stir in some sharp cheddar or even crumbled feta for extra richness and flavor complexity. Just don’t go overboard – we want to enhance, not overwhelm.
Serving Suggestions That Complete the Experience
This salad is the perfect companion to grilled meats, fried chicken, or barbecue anything. It’s rich enough to stand up to bold flavors but cooling enough to balance spicy dishes.
Serve it alongside coleslaw and baked beans for the ultimate picnic spread that’ll make you the most popular person at any outdoor gathering. The combination of textures and flavors creates a satisfying meal that feels complete.
For vegetarian gatherings, pair it with grilled vegetables and corn on the cob. The protein from the eggs makes it substantial enough to satisfy without needing meat on the table.
Storage and Food Safety (Because Nobody Wants Food Poisoning)
This salad keeps beautifully in the refrigerator for up to 4 days, but honestly, it rarely lasts that long. The flavors are at their peak on day 2, so don’t feel bad about making it ahead of time.
Important food safety note: Keep this salad cold! With mayo and eggs, it needs to stay below 40°F. Don’t leave it sitting out at room temperature for more than 2 hours, and in hot weather, that drops to 1 hour.
When transporting to events, pack it in a cooler with plenty of ice. Your delicious creation isn’t worth a trip to the emergency room, no matter how good it tastes.
Troubleshooting for When Things Don’t Go According to Plan
Salad too dry? Add more mayonnaise, a tablespoon at a time, until you reach the desired consistency. Sometimes pasta absorbs more dressing than expected, especially if it sits for a while.
Too tangy? A pinch of sugar or a dollop of sour cream can mellow out excessive acidity. Taste as you go and adjust gradually.
Bland overall? More salt is usually the answer. Don’t be afraid to season generously – pasta salad needs more salt than you think to bring all the flavors together.
Eggs falling apart? Next time, make sure they’re completely cool before chopping, and use a sharper knife. Warm eggs or dull knives create mushy, unappealing egg pieces.
The Final Verdict on This Crowd-Pleasing Creation
This Creamy Deviled Egg Macaroni Salad proves that fusion food doesn’t have to be complicated or weird to be absolutely delicious. By combining two beloved classics, we’ve created something that feels both familiar and exciting at the same time.
It’s the kind of dish that makes people ask for the recipe, and honestly, that’s the highest compliment any cook can receive. The fact that it travels well, improves with time, and satisfies both kids and adults makes it practically perfect for any gathering.
IMO, this is the pasta salad that’ll end your search for the perfect picnic side dish. It’s got everything you want – creamy texture, bold flavor, satisfying protein, and that nostalgic comfort food appeal that makes people feel happy just eating it.
So next time you need to bring something to a gathering and want to be the person everyone remembers, give this recipe a try. Your friends will be asking when you’re making it again before they’ve even finished their first helping, and honestly, isn’t that exactly the kind of kitchen reputation we’re all trying to build? 🙂