Chicken Parmesan Recipe
ChickenParmesan
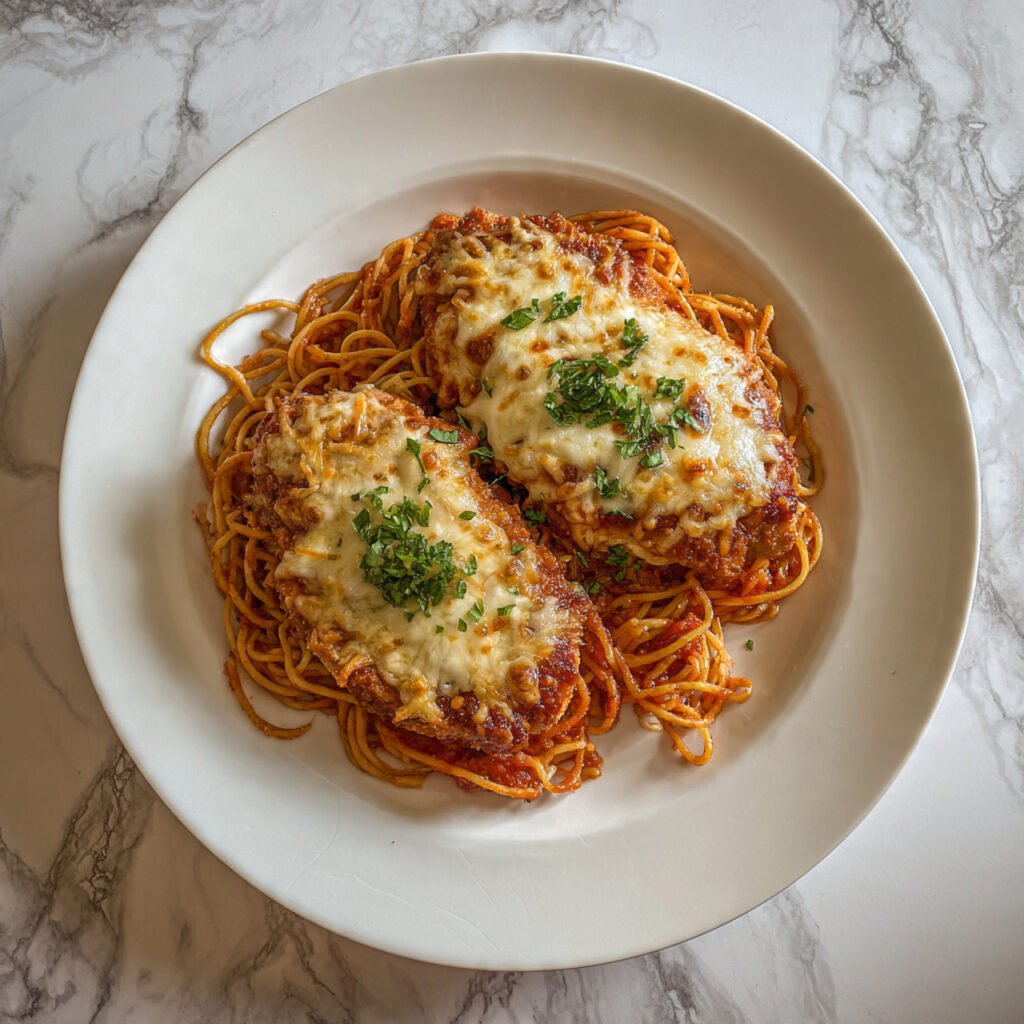
Crispy golden chicken, bold tomato sauce, bubbling mozzarella. The dinner that never needs an occasion — but always makes one.
Some dishes just have a force field around them. Chicken Parmesan is one of those. You sit down to a plate of it — that crackle of breaded chicken, the tug of melted mozzarella, the deep red sauce soaked into everything — and you remember exactly why comfort food became a genre. I’ve been making versions of this for years, and this recipe is the one I’ve landed on: not fussy, not compromised, genuinely great.
What separates a memorable Chicken Parmesan from a forgettable one usually comes down to two things: a proper crispy crust that survives the sauce, and a tomato sauce with real depth rather than something that tastes like it came from a jar of disappointment. Both are completely achievable at home — and I’ll show you exactly how to get there.
No shortcuts that hurt the dish, no unnecessary steps that don’t add anything. Just a properly built, properly cooked Chicken Parm that you’ll want to make every week. Let’s get into it.
Choosing the Right Chicken
Before anything else — the chicken. You can’t build a great Chicken Parm on a bad foundation, and the cut and thickness of your chicken matters more than most recipes admit. Ever wondered why restaurant versions look so uniform and cook so evenly? They pound their chicken flat. You should too.
One more thing: dry your chicken completely with paper towels before breading. Moisture on the surface of the chicken creates steam inside the breading during cooking, which is exactly what makes breading turn soggy. Pat it thoroughly — more than you think you need to. This single step separates crispy from sad.
Everything You Need
The ingredient list is split into three sections because Chicken Parmesan is really three components cooked separately and assembled: the chicken, the tomato sauce, and the cheese topping. You can absolutely use a good store-bought marinara in a pinch, but the 15-minute homemade sauce below is worth every second.
- 4 boneless skinless chicken breasts
- 1 cup breadcrumbs (panko preferred)
- ½ cup finely grated Parmesan, divided
- ½ cup plain flour
- 2 large eggs, beaten
- 1 tsp garlic powder
- 1 tsp dried Italian seasoning
- ½ tsp salt + ¼ tsp black pepper
- ¼ cup neutral oil for pan-frying
- 1 can (400g / 14oz) crushed tomatoes
- 3 garlic cloves, minced
- 2 tbsp olive oil
- 1 tsp dried basil (or handful fresh)
- ½ tsp dried oregano
- 1 tsp sugar (balances acidity)
- Salt and pepper to taste
- 200g fresh mozzarella, sliced
- ¼ cup extra Parmesan, grated
- Fresh basil leaves to finish
On the breadcrumbs — panko is strongly recommended over regular breadcrumbs. Panko absorbs less oil, creates a coarser, crunchier crust, and holds up better under the sauce without turning into a soggy paste. It’s not a small difference; it’s genuinely noticeable. FYI, most major supermarkets carry it now, usually near the regular breadcrumbs.
Step-by-Step Instructions
Work through these in order and everything will time out correctly. The sauce takes barely any hands-on effort, so start it early and let it simmer while you prep and cook the chicken.
Make the Tomato Sauce First
-
1Build the sauce base
Heat 2 tablespoons of olive oil in a small saucepan over medium heat. Add the minced garlic and cook for 60–90 seconds, stirring constantly, until it smells fragrant and turns pale gold. Don’t let it brown — bitter garlic is the enemy of good tomato sauce. Pour in the crushed tomatoes carefully (it will splatter), then add the basil, oregano, sugar, salt, and pepper. Stir everything together and bring to a gentle simmer.
💡 If you have 20 minutes to spare, let this sauce simmer low and uncovered. It concentrates, sweetens, and becomes noticeably better with time. -
2Simmer and set aside
Simmer the sauce on low for at least 12–15 minutes, stirring occasionally. Taste and adjust — more salt, a touch more sugar if the tomatoes are sharp. The sauce should taste slightly bolder than you want it to in the final dish, because it’ll mellow once it hits the chicken and cheese in the oven. Remove from heat and set aside while you handle the chicken. It will stay warm.
Prepare and Bread the Chicken
-
3Butterfly and pound
Preheat your oven to 200°C (400°F). Place a chicken breast flat on your cutting board. Using a sharp knife, slice horizontally through the middle — stopping just before you cut all the way through — then open it like a book. Cover with cling film and pound to an even ¾-inch thickness using a rolling pin or meat mallet. Repeat with all four breasts, then pat each piece completely dry with paper towels.
⚠ Don’t skip the pounding step. Thick, uneven chicken means the outside overcooks before the inside hits temperature. Thin, even chicken cooks perfectly all the way through. -
4Set up your breading station
Set out three shallow bowls in a row: Bowl 1 — flour seasoned with salt and pepper. Bowl 2 — beaten eggs. Bowl 3 — panko breadcrumbs mixed with ¼ cup grated Parmesan, garlic powder, Italian seasoning, salt, and pepper. This three-stage process is what gives you that properly structured, thick crust. Each layer has a job: flour helps the egg stick, egg helps the crumbs stick, crumbs create the crust.
💡 Season every layer generously. Under-seasoned breading produces a bland crust no matter how good your sauce is. -
5Bread each piece
Take a chicken piece and coat it in flour — shake off any excess so you have a thin, even dusting. Dip it fully into the egg, letting any excess drip off. Press it firmly into the breadcrumb mixture, coating both sides and the edges. Press hard and hold for 2–3 seconds — this ensures the crumbs compact into a cohesive layer rather than falling off in chunks during frying. Place each breaded piece on a clean plate. Once all four are done, let them rest for 5 minutes — this helps the coating set and adhere better.
Fry the Chicken
-
6Pan-fry until golden
Heat ¼ cup of neutral oil in a large oven-safe skillet over medium-high heat. The oil needs to be properly hot before the chicken goes in — drop a breadcrumb in: it should sizzle immediately and vigorously. Add the chicken pieces without crowding (work in batches if needed) and cook for 3–4 minutes per side until deeply golden and crispy. You’re not cooking the chicken through at this stage — you’re building the crust. Resist the urge to press down or move the chicken while it’s frying.
⚠ Medium-high heat, not high. Too hot and the outside burns before the crust sets. Too low and the chicken absorbs oil and turns greasy. Medium-high is the sweet spot.
Assemble and Bake
-
7Add sauce and cheese
Transfer all the fried chicken to a large baking dish or keep them in the oven-safe skillet. Spoon 2–3 tablespoons of tomato sauce over each piece — spread it to cover the top but leave the edges of the breading sauce-free. This keeps the outer crust crunchy rather than soggy all the way around. Layer sliced mozzarella over the sauce, then scatter over the remaining Parmesan. The cheese should cover the sauce generously but not bury it completely.
-
8Bake to bubbling perfection
Place the dish in your preheated 200°C (400°F) oven and bake for 15–18 minutes, until the mozzarella has melted completely and the edges are bubbling. For a slightly browned, blistered top on the cheese, switch the oven to broil/grill for the final 2–3 minutes. Watch it carefully at this point — it goes from perfectly blistered to burnt faster than you’d expect. Remove from the oven and rest for 3–4 minutes before serving.
💡 Check internal chicken temperature — it should read 74°C (165°F). If your chicken was thicker and you’re unsure, a quick thermometer check removes all doubt. -
9Finish and serve
Tear or stack a few fresh basil leaves over each piece and serve immediately. The basil wilts quickly from the heat and releases a bright, herbaceous fragrance that cuts through the richness perfectly. Bring the dish straight to the table — Chicken Parmesan is at its absolute best the moment the cheese stops bubbling. Serve with spaghetti, crusty bread, or a simple green salad alongside.
The Secrets to a Truly Great Chicken Parm
- Dry the chicken obsessively. Moisture is the enemy of crunch. Pat it dry twice if you have to — once after butterflying and again just before breading.
- Let the breaded chicken rest before frying. Even 5 minutes on the bench after breading helps the coating bond to the surface and dramatically reduces falling-off in the pan.
- Don’t sauce the edges. Leaving ½ inch of un-sauced breading around each piece keeps those edges crackling crispy instead of going soft. This one detail makes a visible difference.
- Fresh mozzarella over shredded. Fresh mozzarella melts into silky, stretchy pools. Pre-shredded mozzarella contains anti-caking agents that make it melt greasier and less smoothly. IMO, worth the small extra cost every time.
- Use an oven-safe skillet and go straight from stovetop to oven. Fewer dishes, better heat retention, and you avoid moving the chicken unnecessarily after that crust has formed.
- Rest before cutting. Three to four minutes of resting lets the juices redistribute. Cut immediately and they run everywhere, leaving you with drier chicken and a wet plate.
Variations Worth Exploring
The classic formula is genuinely hard to beat, but once you know how the dish works, you can play with it in some really satisfying directions. Here are the ones I keep coming back to:
What to Serve Alongside
Chicken Parm is a generous, rich main course — so you don’t need much alongside it. A simple side that contrasts the richness works better than something that competes with it. Here are the pairings that work best:
Storing and Reheating
Chicken Parmesan stores well — the flavors actually deepen overnight. The one challenge is maintaining the crust, which softens in the fridge. The reheating method below fixes this completely:
| Method | Container | Duration | Reheating |
|---|---|---|---|
| Refrigerator | Airtight container | Up to 3 days | Oven at 180°C for 12–15 min. Avoid the microwave — it destroys the crust and turns everything rubbery. |
| Freezer (assembled) | Freezer-safe container | Up to 2 months | Thaw overnight in fridge, then reheat in oven at 180°C for 18–20 min until heated through. |
| Freezer (chicken only) | Wrap individually in foil | Up to 3 months | Best approach — freeze the fried, un-sauced chicken. Reheat in oven, then add fresh sauce and cheese. |
Questions People Actually Ask
Three main culprits. First, the chicken was wet when you breaded it — always pat completely dry. Second, you didn’t press the breadcrumbs on firmly enough. Third, you moved the chicken too soon — let it sit undisturbed for the full 3–4 minutes per side, and the crust will release cleanly on its own when it’s ready. Forcing it early tears the breading off.
Absolutely — and you don’t need to feel guilty about it. Choose a good quality marinara with simple ingredients (crushed tomatoes, garlic, olive oil, basil). Warm it through and season it to taste before using. The homemade sauce is better, but a great store-bought marinara still makes a very good Chicken Parm.
Switch to the broil/grill setting for 2–3 minutes. Watch it like a hawk — it goes from pale to beautifully blistered to burnt in very short order under a broiler. Position the rack in the upper third of the oven for best results. If your oven doesn’t have a broil setting, increase the temperature to 230°C for the final 5 minutes.
Not exactly — it’s Italian-American. The dish evolved from Southern Italian immigrants in New York and the northeastern US in the early 20th century, adapted from dishes like eggplant parmigiana. You won’t find it on menus in Italy, but Italian-Americans made it so well and so memorably that it became one of the most beloved dishes in American food culture. Origin story aside, it’s a genuinely great dish.
Yes — with a smart split approach. Make the tomato sauce a day or two ahead (it actually improves). Bread and pan-fry the chicken up to 3 hours ahead, then rest it on a rack uncovered at room temperature. When guests arrive, add the sauce and cheese and finish in the oven. This way you avoid the last-minute frying rush and still serve piping hot, fresh-from-the-oven Chicken Parm.
Now That’s a Proper Chicken Parm
This is the recipe I reach for when someone asks for “the good stuff.” Crispy crust, bold sauce, bubbling cheese, juicy chicken — every element earns its place on the plate. Once you nail it, you’ll understand why this dish has been a weeknight staple and a special-occasion centerpiece for decades.
The techniques here — drying the chicken properly, seasoning every layer, not saucing the edges — aren’t complicated. They’re just deliberate. And deliberate cooking is what turns a decent dinner into one people actually remember.
So preheat that oven. The best Chicken Parmesan you’ve ever made is about 45 minutes away.
Save This Recipe ↓