Cheesy Garlic Parmesan Bombs – Kid-Friendly Dinner Idea
Picture this: you’re hosting a party, and everyone’s expecting the usual chips and dip routine. Then you walk out with these golden, pillowy bombs of pure deliciousness, and suddenly you’re the hero of the evening. That’s exactly what happened to me last month when I first made these Garlic Parmesan Cheeseburger Bombs, and trust me, I’ve been getting requests for the recipe ever since.
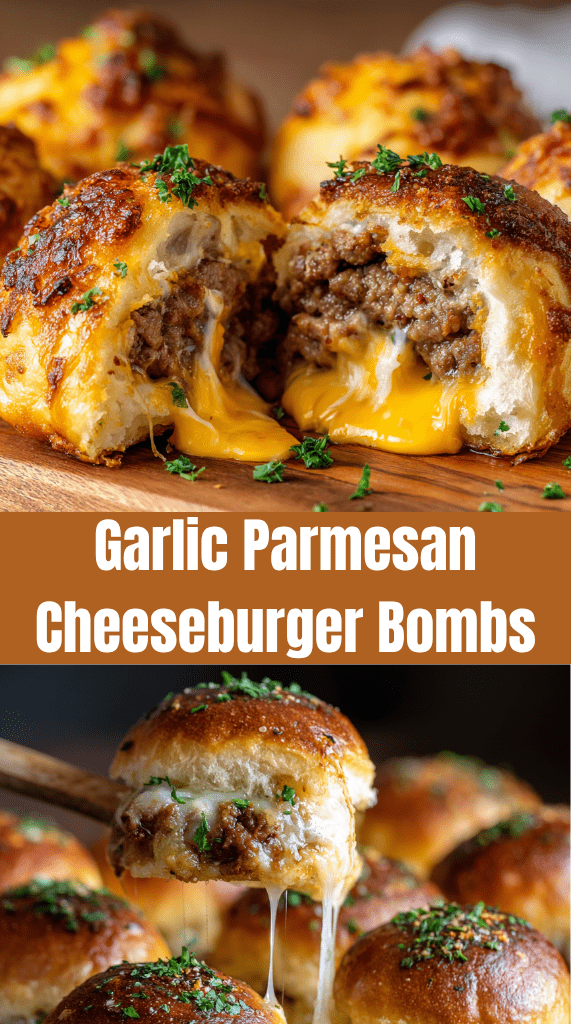
These aren’t your average appetizers – they’re like little cheeseburger presents wrapped in buttery, garlicky dough that practically melts in your mouth. The best part? They’re ridiculously easy to make, despite looking like you spent hours in the kitchen. Sometimes the simplest ideas are the most genius ones, right?
Nutrition Information
| Nutrient | Per Serving (2 bombs) |
| Calories | 285 |
| Total Fat | 18g |
| Saturated Fat | 9g |
| Cholesterol | 45mg |
| Sodium | 520mg |
| Total Carbs | 22g |
| Dietary Fiber | 1g |
| Sugars | 3g |
| Protein | 12g |
Makes 12 bombs, serving size: 2 bombs
What Makes These Bombs So Addictive?
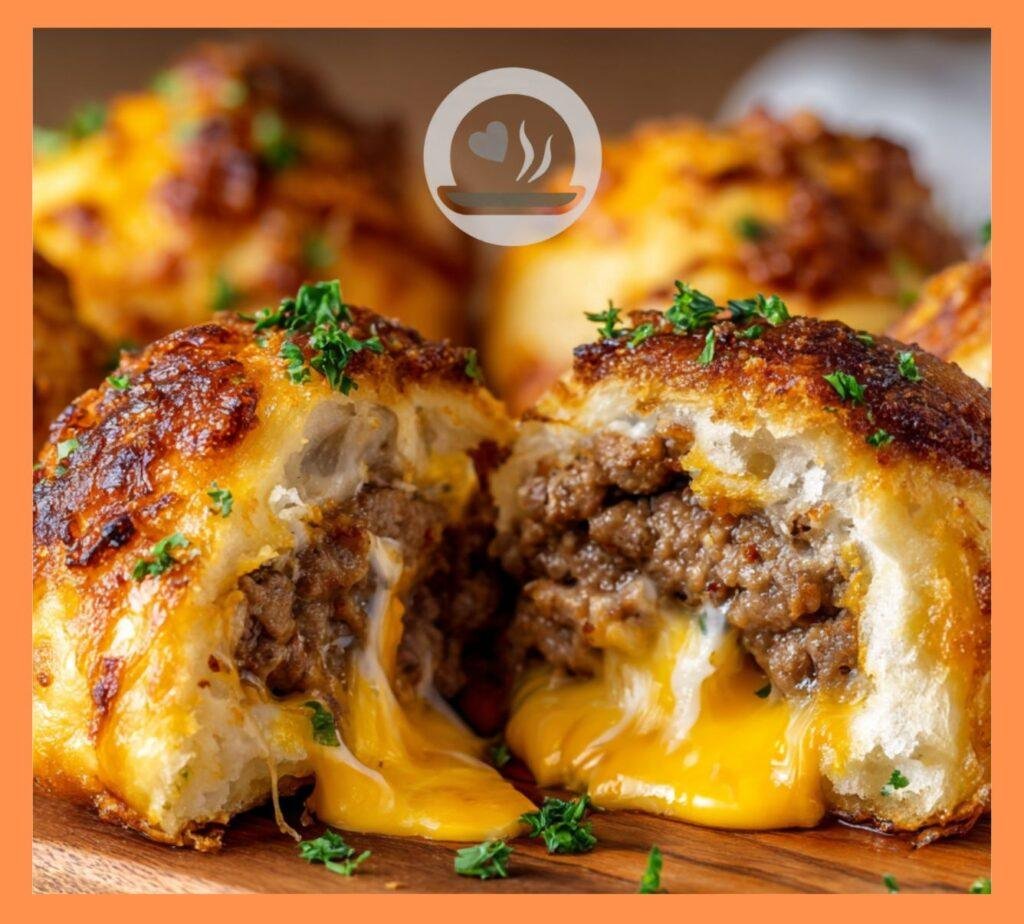
Ever wondered why some foods just hit differently? These cheeseburger bombs combine everything we love about comfort food into one perfect bite. You get the savory ground beef with classic burger seasonings, the gooey melted cheese that stretches when you pull it apart, and that buttery garlic-parmesan coating that makes your taste buds do a happy dance.
I stumbled across this concept during one of those “what’s in the fridge” moments. Had some leftover ground beef, a tube of biscuit dough that was about to expire, and way too much cheese (is that even possible?). Three ingredients later, I had accidentally created what my friends now call “crack bombs” – and honestly, the name isn’t far off.
The magic happens when the biscuit dough bakes around the filling, creating this incredible contrast between the crispy exterior and the molten center. It’s like a cheeseburger and a dinner roll had a baby, and that baby grew up to be absolutely irresistible.
Ingredients You’ll Need
For the Filling:
- 1 lb ground beef (80/20 blend works perfectly)
- 1 medium onion, finely diced
- 2 cloves garlic, minced
- 1 tsp Worcestershire sauce
- 1 tsp salt
- 1/2 tsp black pepper
- 1/2 tsp smoked paprika
- 1 cup sharp cheddar cheese, shredded
- 1/2 cup mozzarella cheese, shredded
For the Bombs:
- 2 tubes (16 oz each) refrigerated biscuit dough
- 4 tbsp butter, melted
- 3 cloves garlic, minced
- 1/2 cup Parmesan cheese, grated
- 2 tbsp fresh parsley, chopped
- 1/2 tsp garlic powder
- Pinch of salt
Step-by-Step Instructions
Prep the Filling (This Is Where the Magic Starts)
Step 1: Heat a large skillet over medium-high heat. Add the ground beef and cook, breaking it up with a spoon as it browns. This should take about 6-8 minutes. Don’t rush this part – you want those beautiful brown bits that add serious flavor.
Step 2: Add the diced onion to the beef and cook for another 3-4 minutes until softened. The onions should be translucent but not mushy. Nobody wants soggy bombs, am I right?
Step 3: Stir in the minced garlic, Worcestershire sauce, salt, pepper, and smoked paprika. Cook for another minute until fragrant. Your kitchen should smell absolutely amazing right about now.
Step 4: Remove from heat and let cool for about 10 minutes. This cooling step is crucial – if the mixture is too hot, it’ll melt the cheese prematurely and make assembly messy.
Step 5: Once cooled, mix in both cheeses. The mixture should hold together nicely but not be too wet. If it seems loose, add a bit more cheese. Because more cheese is never a bad thing 🙂
Assembly Time (The Fun Part!)
Step 6: Preheat your oven to 375°F (190°C). Line a baking sheet with parchment paper.
Step 7: Pop open those biscuit tubes and separate the dough. You should have 16 biscuits total. Gently flatten each biscuit with your palm – don’t roll them out, just press them into roughly 4-inch circles.
Step 8: Place about 2 tablespoons of the beef mixture in the center of each biscuit circle. Don’t overstuff them, or you’ll have a mess on your hands. Trust me on this one – I learned the hard way.
Step 9: Here’s the trick: gather the edges of the dough and pinch them tightly at the top to seal. Roll the sealed bomb between your palms to make it smooth and round. Place seam-side down on your prepared baking sheet.
The Garlic Parmesan Glory
Step 10: In a small bowl, combine the melted butter, minced garlic, and garlic powder. This is your flavor bomb coating, and it’s absolutely essential.
Step 11: Brush each bomb generously with the garlic butter mixture. Don’t be shy here – this is what creates that golden, crispy exterior we’re after.
Step 12: Sprinkle the grated Parmesan cheese over each bomb, followed by the chopped parsley. The Parmesan will create this incredible crispy shell that’ll make you question why you ever ate regular dinner rolls.
Baking to Perfection
Step 13: Bake for 15-18 minutes, or until the bombs are golden brown and sound hollow when tapped. The internal temperature should reach 165°F if you want to be precise about it.
Step 14: Let them cool for about 5 minutes before serving. I know it’s torture to wait, but biting into molten cheese isn’t fun for anyone involved.
Pro Tips That’ll Make You Look Like a Genius
Cheese Selection Matters
IMO, the sharp cheddar and mozzarella combo is perfect, but feel free to experiment. I’ve tried these with pepper jack for a spicy kick, and they were phenomenal. Just avoid anything too soft or it’ll leak out during baking.
Make-Ahead Magic
You can assemble these bombs up to 24 hours in advance. Just cover them tightly and refrigerate. Add an extra 2-3 minutes to the baking time if you’re starting from cold.
Leftover Strategy
Got leftover bombs? (Unlikely, but possible.) They reheat beautifully in a 350°F oven for about 8-10 minutes. Don’t use the microwave unless you enjoy chewy disappointment.
Serving Suggestions That’ll Blow Minds
These bombs are pretty perfect on their own, but if you want to go the extra mile, serve them with:
- Ranch dressing for dipping (because everything’s better with ranch)
- Spicy ketchup or sriracha mayo for those who like heat
- Pickle spears on the side for that classic burger experience
I like to arrange them on a wooden board with small bowls of different dipping sauces. It looks fancy but requires zero extra effort – my kind of presentation.
Variations to Keep Things Interesting
Breakfast Bomb Version
Replace the ground beef with cooked breakfast sausage and add scrambled eggs to the mix. Use the same garlic Parmesan coating. These are absolutely killer for brunch gatherings.
Veggie-Packed Option
Sauté some bell peppers and mushrooms with the onions for extra flavor and nutrition. The vegetables add a nice texture contrast that even meat-lovers appreciate.
Spicy Jalapeño Twist
Add diced jalapeños to the beef mixture and use pepper jack cheese instead of cheddar. Fair warning: these pack some serious heat, but they’re addictive as heck.
Why These Work for Every Occasion
The beauty of these cheeseburger bombs lies in their versatility. They’re fancy enough for a dinner party but casual enough for game day. Kids absolutely lose their minds over them, and adults can’t stop reaching for “just one more.”
I’ve served these at everything from birthday parties to office potlucks, and they disappear faster than I can make them. The combination of familiar flavors in an unexpected format just works on every level.
Troubleshooting Common Issues
Bombs Opening During Baking
This usually happens when you don’t seal the dough properly or overstuff them. Make sure to pinch those seams tight and don’t be greedy with the filling.
Soggy Bottoms
If your bombs are getting soggy, your beef mixture might be too wet. Let it cool completely and drain any excess grease before adding the cheese.
Uneven Browning
Rotate your baking sheet halfway through cooking, and make sure your oven rack is in the center position. Some ovens have hot spots that can cause uneven browning.
The Final Verdict
These Garlic Parmesan Cheeseburger Bombs have officially become my go-to crowd-pleaser, and for good reason. They’re foolproof, delicious, and guaranteed to make you the star of any gathering. Plus, there’s something deeply satisfying about watching people’s faces light up when they bite into one of these golden beauties.
The best part? You probably have most of these ingredients in your kitchen right now. No exotic spices, no special equipment – just simple, quality ingredients combined in the most delicious way possible.
So next time you’re staring into your fridge wondering what to make, remember these little bombs of joy. Your taste buds (and your guests) will thank you. And hey, if you end up making them as often as I do, you might want to buy stock in biscuit dough companies – just saying 🙂