Apple Fritter Bites – Crispy, Glazed & Full of Fall Flavor
You know that moment when you walk into a donut shop and the smell of fresh apple fritters hits you like a warm, cinnamon-scented hug? That’s exactly what we’re recreating here, but in adorable bite-sized portions that are way more dangerous than their full-sized cousins.

I discovered this recipe during one of those late-night baking experiments when I had a bag of apples that were getting a little too soft for eating but perfect for cooking. What started as a “let’s see what happens” moment turned into my most requested dessert. Seriously, I’ve made these for office parties, family gatherings, and random Tuesday nights when I needed a pick-me-up.
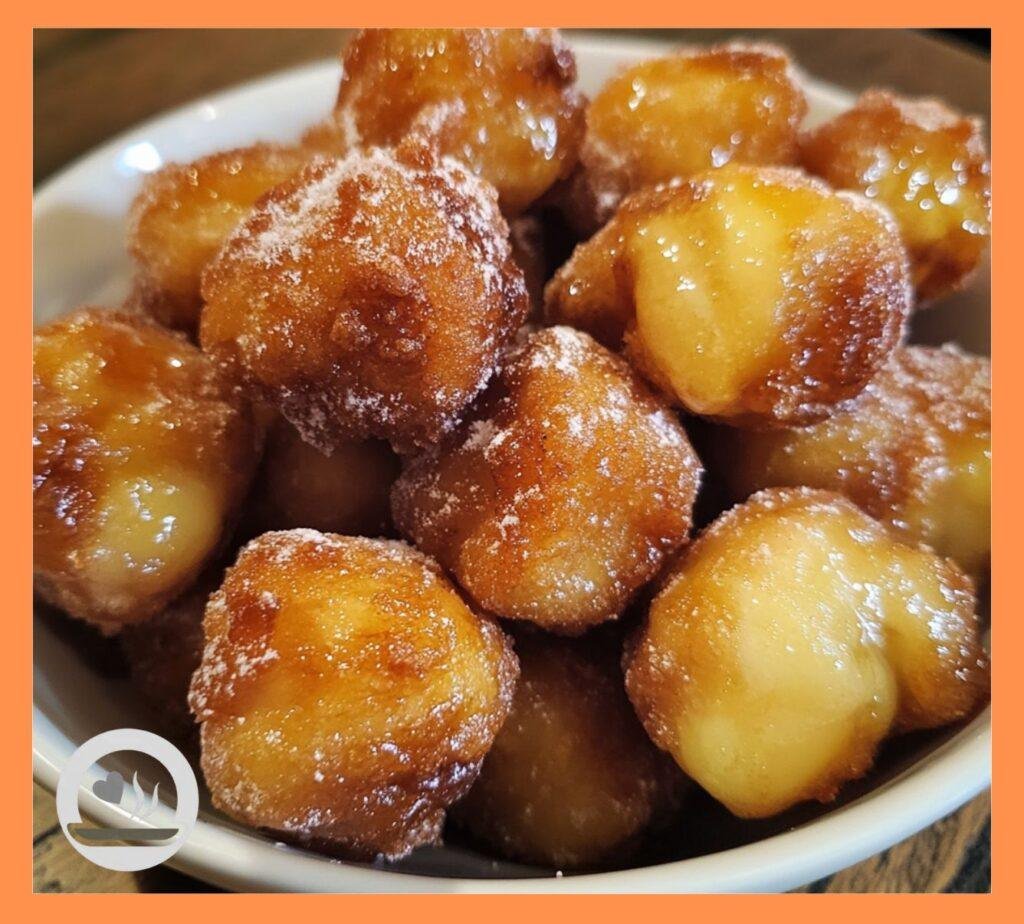
The beauty of apple fritter bites? You get all that crispy-outside, tender-inside goodness with chunks of sweet apple and that irresistible cinnamon glaze, but in a size that doesn’t require a commitment. Well, until you eat twelve of them without realizing it.
Nutrition Information
Here’s the nutritional breakdown per serving (makes 24 bites, 3 bites per serving):
| Nutrient | Amount |
| Calories | 195 |
| Total Fat | 8g |
| Saturated Fat | 2g |
| Cholesterol | 28mg |
| Sodium | 145mg |
| Total Carbohydrates | 31g |
| Dietary Fiber | 1g |
| Sugars | 22g |
| Protein | 3g |
| Vitamin C | 2mg |
| Calcium | 45mg |
| Iron | 1.1mg |
What Makes These Apple Fritter Bites Special?
The secret to perfect apple fritter bites isn’t just in the batter—it’s in the apple preparation and the frying technique. Most people make the mistake of using any old apple and cutting them too big. Wrong move! You need apples that hold their shape but still get tender, and they need to be diced small enough to distribute evenly throughout each bite.
I use a combination of Granny Smith and Honeycrisp apples because they give you that perfect balance of tart and sweet. Plus, they don’t turn to mush when they hit the hot oil, which is crucial for maintaining that satisfying apple chunk in every bite.
Ever wonder why bakery fritters taste so much better than homemade attempts? It’s all about that perfect batter consistency and oil temperature control. Too thick and you get dense, heavy bites. Too thin and they fall apart in the oil. We’re aiming for that Goldilocks zone where everything is just right.
Ingredients You’ll Need
For the Apple Fritter Bites:
- 2 cups all-purpose flour
- 1/2 cup granulated sugar
- 2 teaspoons baking powder
- 1 teaspoon ground cinnamon
- 1/2 teaspoon salt
- 1/4 teaspoon nutmeg
- 2/3 cup whole milk
- 2 large eggs
- 3 tablespoons melted butter
- 1 teaspoon vanilla extract
- 2 medium apples (1 Granny Smith, 1 Honeycrisp, peeled and diced small)
- Vegetable oil for frying (about 6-8 cups)
For the Cinnamon Glaze:
- 2 cups powdered sugar
- 1/4 cup whole milk
- 1 teaspoon vanilla extract
- 1/2 teaspoon ground cinnamon
- Pinch of salt
Optional Finishing Touch:
- Extra cinnamon sugar for dusting
The Art of Perfect Apple Prep
This is where most people go wrong, so pay attention! Your apples need to be diced into 1/4-inch pieces—small enough to distribute evenly but large enough that you actually taste them in each bite.
After dicing, toss the apple pieces with a tablespoon of flour and a pinch of cinnamon. This little trick helps prevent the apples from releasing too much moisture into the batter and keeps them from sinking to the bottom during frying.
Don’t skip the peeling step either. Apple peels get chewy and unpleasant when fried, and nobody wants to be picking bits out of their teeth while trying to enjoy these little gems.
Step-by-Step Instructions
Step 1: Get Your Mise en Place Together
Before you start mixing anything, get all your ingredients measured and ready. Trust me, once you start this process, you’ll want to move quickly to maintain the perfect batter consistency.
Dice your apples and toss them with that flour and cinnamon mixture I mentioned. Set them aside while you work on the batter. The flour coating will help prevent them from making your batter too wet.
Step 2: Create the Perfect Batter Base
In a large mixing bowl, whisk together flour, sugar, baking powder, cinnamon, salt, and nutmeg. Make sure there are no lumps—sifting isn’t necessary, but a good whisking session will do the trick.
In a separate bowl, combine milk, eggs, melted butter, and vanilla extract. Here’s a crucial tip: make sure your melted butter isn’t too hot, or it’ll scramble your eggs. Let it cool for a minute or two after melting.
Step 3: The Gentle Mixing Method
Pour the wet ingredients into the dry ingredients and stir just until combined. The batter should look a bit lumpy and rough—that’s exactly what we want. Overmixing develops the gluten and gives you tough, chewy fritters instead of tender ones.
Fold in your prepared apple pieces gently. The batter should be thick enough to hold the apples but not so thick that it’s difficult to drop from a spoon.
Step 4: Oil Temperature Mastery
Heat your oil to exactly 375°F in a heavy-bottomed pot or deep fryer. This temperature is critical—too hot and the outside burns before the inside cooks, too cool and you get greasy, oil-soaked fritters.
Don’t have a thermometer? Drop a small spoonful of batter into the oil. If it sizzles immediately and rises to the surface within a few seconds, you’re in the right range.
Step 5: The Frying Dance
Using a small cookie scoop or two spoons, drop rounded tablespoons of batter into the hot oil. Don’t overcrowd the pot—work in batches of 6-8 fritters at a time to maintain oil temperature.
Fry for 2-3 minutes on each side until golden brown and cooked through. They should sound hollow when tapped with a spoon and have that beautiful golden color that screams “eat me now!”
Remove with a slotted spoon and drain on paper towels. Try not to eat them immediately—I know it’s hard, but they’re molten hot inside!
Step 6: Glaze Like a Pro
While your fritters are still slightly warm (but not scorching hot), it’s time for the glaze magic. Whisk together powdered sugar, milk, vanilla, cinnamon, and a pinch of salt until smooth.
The consistency should be thick enough to coat the back of a spoon but thin enough to flow easily. Too thick? Add milk a teaspoon at a time. Too thin? Whisk in more powdered sugar.
Dip each fritter bite into the glaze, letting excess drip off, then place on a wire rack to set. The glaze should form a beautiful coating that hardens slightly as it cools.
Pro Tips from Someone Who’s Made Way Too Many Batches
Room temperature ingredients mix better and create a more uniform batter. Take your eggs and milk out about 30 minutes before you start cooking.
Don’t flip too early! Wait until you see the edges set and the bottom turns golden brown. Flipping too soon leads to misshapen fritters and oil absorption.
Test fry one fritter first to check your oil temperature and batter consistency. Better to adjust now than ruin a whole batch.
Double-dip for extra glaze if you’re feeling indulgent. Let the first coat set for 5 minutes, then dip again for an extra-thick glaze layer.
The Make-Ahead Game
These fritter bites are perfect for prep-ahead situations. You can make the batter up to 4 hours in advance and keep it covered in the refrigerator. The apples might release a bit more juice, but just give it a gentle stir before frying.
Already-fried fritters keep well for about 2 days in an airtight container. To refresh them, pop them in a 350°F oven for 3-4 minutes to crisp up the outside again.
Flavor Variations That’ll Blow Your Mind
Once you master the basic recipe, try these delicious twists:
Caramel Apple: Add 2 tablespoons of caramel sauce to the batter and use caramel glaze instead of cinnamon Spiced Apple: Increase the cinnamon and add a pinch of cardamom and ginger Apple Cranberry: Fold in 1/3 cup dried cranberries with the apples Maple Apple: Replace vanilla with maple extract and use maple glaze
Troubleshooting Common Issues
Fritters Fall Apart in Oil
This usually means your batter is too thin or your oil isn’t hot enough. Add a bit more flour to thicken the batter, and double-check that oil temperature.
Dense, Heavy Texture
Overmixing is the culprit here. Remember, lumpy batter is your friend! Also, make sure your baking powder is fresh—it loses potency after about 6 months.
Apples Turn to Mush
You’re either using the wrong apple variety or cutting them too small. Stick with firm apples and keep those pieces around 1/4-inch.
Glaze Won’t Stick
The fritters might be too hot or too cool. They should be warm to the touch but not steaming when you glaze them.
Serving Suggestions for Maximum Impact
These apple fritter bites are incredible on their own, but they also make fantastic additions to:
Brunch spreads alongside coffee and fresh fruit Dessert platters with vanilla ice cream and caramel sauce Fall picnics packed in airtight containers Holiday cookie exchanges (yes, they count as cookies in my book!)
FYI, they’re also amazing crumbled over vanilla yogurt or oatmeal for a decadent breakfast treat.
The Economics of Homemade Happiness
Making these at home costs about $0.30 per bite compared to $1.50+ at fancy bakeries. Plus, you get the satisfaction of creating something amazing from scratch and your house smells like a bakery for hours afterward.
I usually make double batches because they disappear so quickly. Trust me, you’ll want extras, and they freeze beautifully for up to 3 months.
Storage and Reheating Wisdom
Store leftover fritter bites in an airtight container at room temperature for up to 3 days. The glaze might get a bit soft, but they’ll still taste amazing.
To freeze, place unglazed fritters on a baking sheet until solid, then transfer to freezer bags. Thaw at room temperature and glaze just before serving.
For reheating, a quick 30-second zap in the microwave works, but the oven method (350°F for 3-4 minutes) gives you back that crispy exterior.
The Science Behind the Perfect Bite
The combination of baking powder and the right liquid-to-flour ratio creates that perfect tender crumb. The sugar in the batter helps with browning and adds structure, while the eggs provide richness and binding power.
The apples release moisture as they cook, which actually helps steam the inside of the fritters while the outside crisps up. It’s like having a built-in moisture system that prevents dry, tough results.
When Things Go Perfectly Right
There’s something magical about nailing this recipe. The moment you bite into a perfectly cooked apple fritter bite—crispy outside, tender inside, with chunks of sweet apple and that gorgeous cinnamon glaze—you’ll understand why I’ve been making these obsessively for years.
The best part? Watching other people’s faces when they try them for the first time. That little pause followed by the inevitable “Oh my God, what are these?” reaction never gets old 🙂
The Final Word
These apple fritter bites aren’t just a dessert—they’re a happiness delivery system disguised as fried dough. They bring together everything we love about fall flavors in a package that’s impossible to resist.
Sure, they take a bit of effort with the frying and glazing, but the payoff is absolutely worth it. You’ll end up with a treat that’s better than anything you can buy and the kind of recipe people will beg you to make again and again.
So grab those apples, heat up that oil, and get ready to create some seriously addictive little bites of joy. Just don’t blame me when you find yourself making them every weekend—some obsessions are totally worth having!