Chicken Parmesan Recipe
There is something incredibly comforting about a golden, crispy chicken breast smothered in tangy marinara and melted mozzarella. It’s the kind of meal that makes the whole house smell like a cozy Italian kitchen. While many people think you need to be a professional chef to get that perfect “crunch,” the secret actually lies in a few simple home-cook techniques that ensure the coating stays crispy even under the sauce.
In this version, we are skipping the heavy restaurant feel and focusing on fresh, vibrant flavors. We’ll use a blend of herbs and a specific breading method to make sure every bite is seasoned to perfection.
Why This Recipe Works
- The Double-Dredge: By ensuring the chicken is perfectly coated in seasoned flour before the egg wash, the breadcrumbs have a solid foundation to stick to.
- High-Heat Pan Searing: We aren’t deep-frying here. A quick sear in a shallow pan locks in the juices while creating that iconic golden crust.
- Fresh Mozzarella: Using fresh slices rather than pre-shredded cheese gives you that beautiful, gooey pull and a much cleaner flavor.
Kitchen Tips for Success
- Pound the Chicken: Use a meat mallet (or even a heavy skillet) to even out the thickness of your chicken breasts. This ensures they cook at the same rate so the edges don’t dry out before the center is done.
- Don’t Over-Sauce: To keep the breading crispy, spoon the marinara only down the center of the chicken, leaving the edges exposed.
- Fresh Herbs: If you have fresh basil or parsley, toss it on right at the end. The heat from the cheese will wake up the oils in the herbs for an amazing aroma.
The Recipe
| Prep Time | Cook Time | Total Time | Calories (approx.) |
| 20 Mins | 25 Mins | 45 Mins | 540 kcal per serving |
Ingredients
For the Chicken:
- 2 large boneless, skinless chicken breasts (halved lengthwise)
- 1/2 cup all-purpose flour
- 2 large eggs, beaten
- 1 cup Panko breadcrumbs
- 1/2 cup grated Parmesan cheese
- 1 tsp dried oregano
- 1/2 tsp garlic powder
- Salt and black pepper to taste
- 3 tbsp olive oil (for frying)
For the Topping:
- 1.5 cups marinara sauce (homemade or high-quality store-bought)
- 1 cup fresh mozzarella cheese, sliced or shredded
- Fresh basil leaves for garnish
Instructions
- Prepare the Chicken: Place the halved chicken breasts between two sheets of plastic wrap. Pound them gently until they are an even 1/2-inch thickness. Season both sides generously with salt and pepper.
- Set Up the Breading Station: You’ll need three shallow bowls.
- Bowl 1: Flour, a pinch of salt, and pepper.
- Bowl 2: Beaten eggs.
- Bowl 3: Combine Panko, grated Parmesan, oregano, and garlic powder.
- Bread the Chicken: Dredge each piece of chicken in the flour (shake off excess), dip into the egg wash, and then press firmly into the breadcrumb mixture until fully coated.
- Pan-Fry: Heat olive oil in a large oven-safe skillet over medium-high heat. Once the oil is shimmering, add the chicken. Cook for 3–4 minutes per side until the coating is a deep golden brown.
- Assemble: Preheat your oven broiler. Spoon about 1/4 cup of marinara sauce over the center of each chicken breast. Top with a generous amount of mozzarella cheese.
- Melt & Brown: Place the skillet under the broiler for 2–3 minutes, or until the cheese is melted, bubbly, and shows a few golden spots.
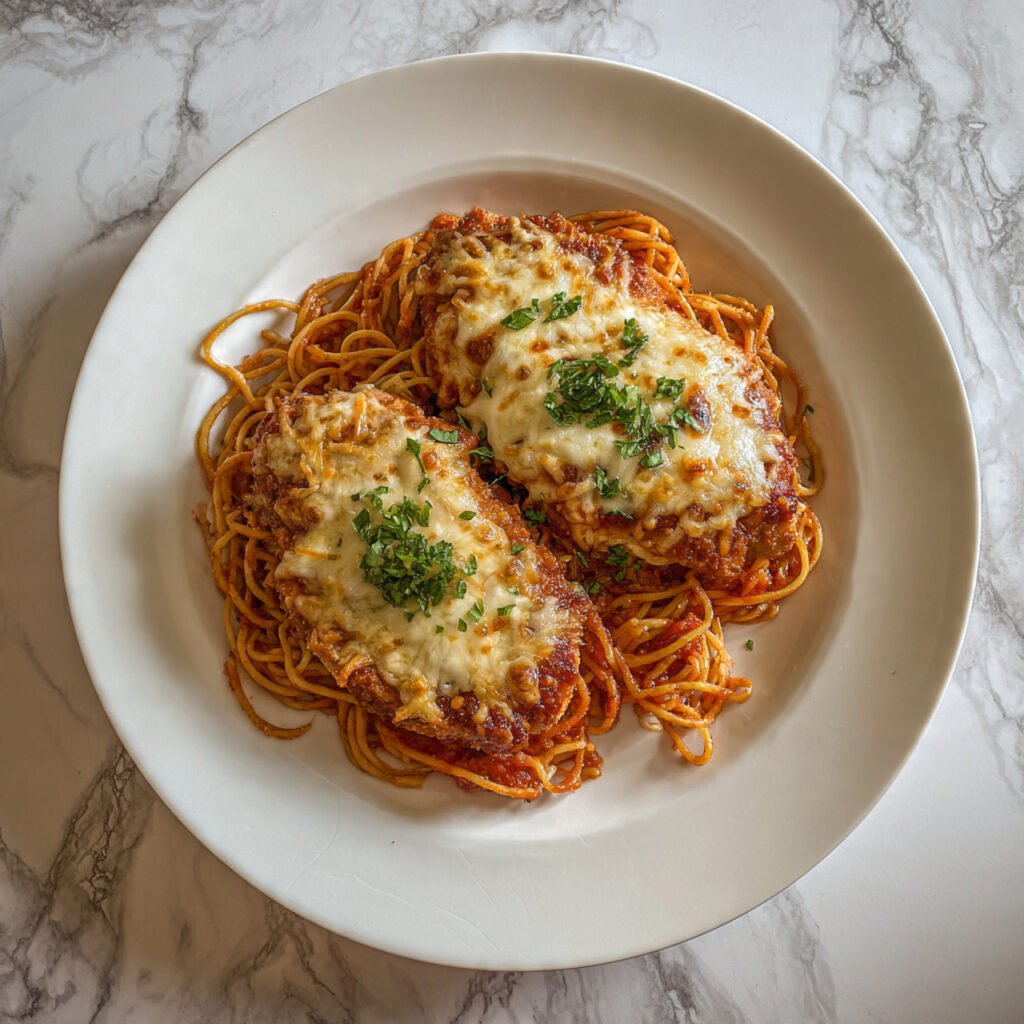
- Serve: Garnish with fresh basil and serve immediately over a bed of spaghetti or with a crisp side salad.
Perfect Pairings
While spaghetti is the classic choice, this Chicken Parmesan also pairs beautifully with:
- Garlic Butter Zucchini Noodles: For a lighter, fresher take.
- Roasted Broccolini: Tossed with lemon and a bit of red pepper flakes.
- Crispy Smashed Potatoes: If you want to lean into the ultimate comfort food vibe.