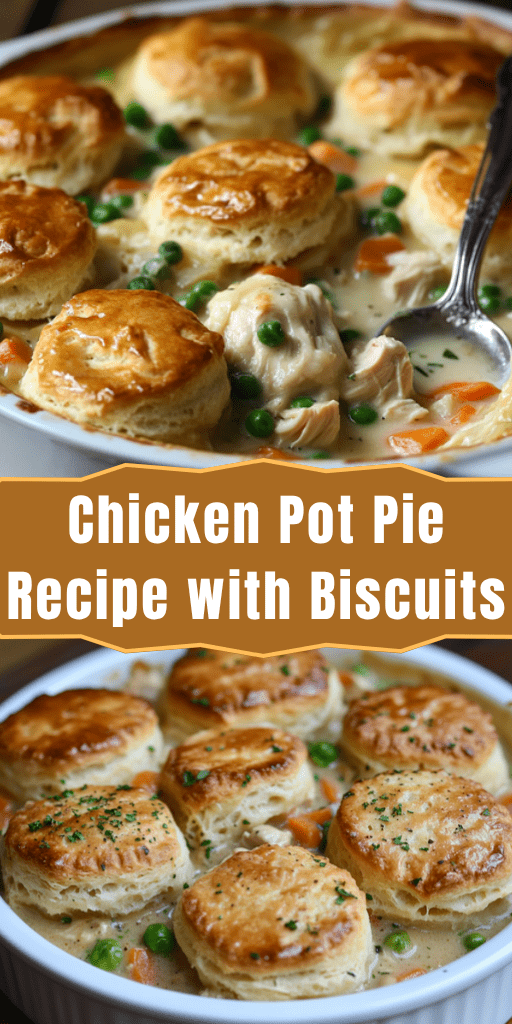
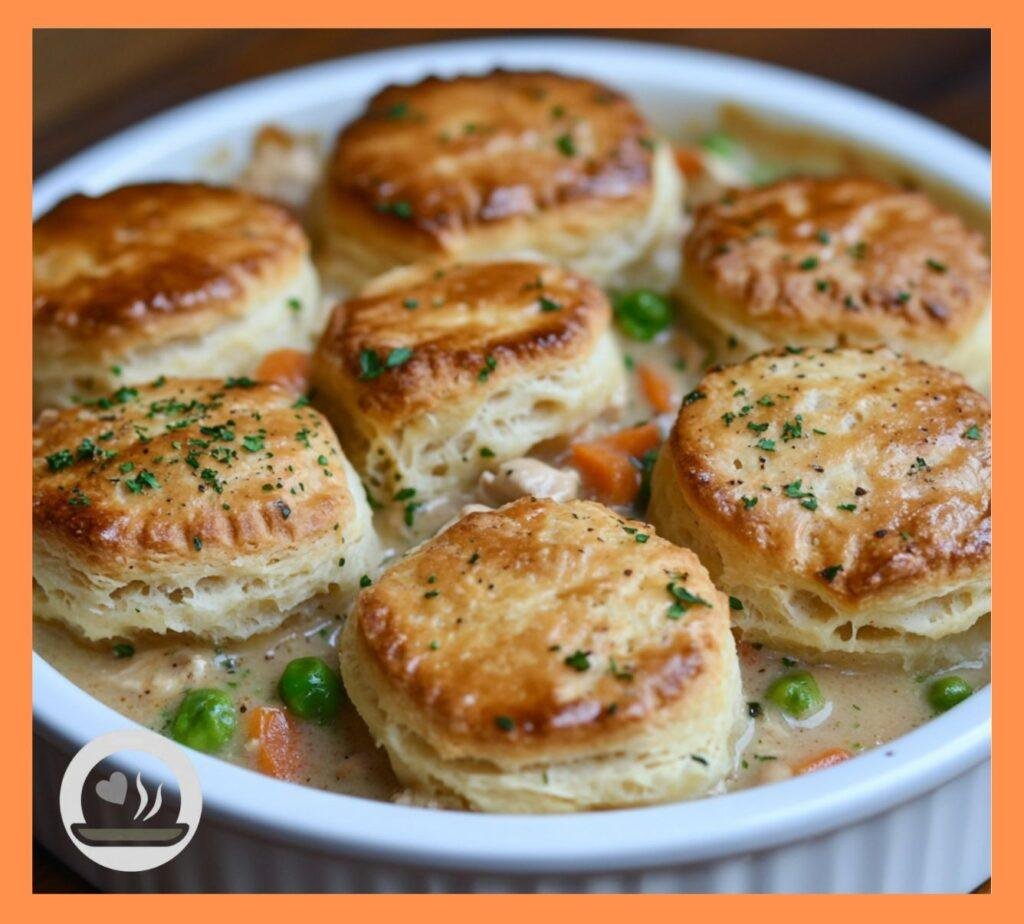
Chicken Pot Pie Recipe with Biscuits – Cozy, Creamy & Easy
There’s something magical about the first bite of a proper chicken pot pie. You know the one I’m talking about—where the flaky biscuit gives way to that rich, creamy filling packed with tender chicken and perfectly cooked vegetables. It’s like getting a warm hug on a cold day, except this hug is edible and comes with the most incredible aroma wafting through your kitchen.
I’ll be honest with you—I spent years making mediocre chicken pot pies before I figured out the secret. The game-changer wasn’t some fancy technique or expensive ingredient. It was realizing that the biscuit topping makes or breaks the entire dish. Skip the store-bought stuff and make your own fluffy, buttery biscuits, and suddenly you’ve got a pot pie that’ll have people asking for seconds before they’ve finished their firsts.
Here’s what really sold me on perfecting this recipe: it’s the kind of meal that brings people together. Whether it’s a Sunday dinner with the family or a cozy weeknight when you want something that feels like home, this chicken pot pie delivers every single time. Plus, it’s sneaky practical—you can make it ahead, freeze it, and pull it out when you need comfort food in a hurry.
Nutrition Information
| Nutrient | Per Serving |
| Calories | 565 |
| Protein | 32g |
| Carbohydrates | 45g |
| Fat | 28g |
| Fiber | 4g |
| Sugar | 8g |
| Sodium | 1,240mg |
| Calcium | 195mg |
| Iron | 3.8mg |
| Vitamin A | 185% DV |
Based on one serving (serves 6-8)
Why This Recipe Will Become Your Go-To Comfort Food
Let’s talk about what makes this chicken pot pie different from every other recipe you’ve tried. First off, we’re not cutting corners. The filling gets built in layers of flavor—we’re talking about properly sautéed vegetables, a roux that actually thickens without being gluey, and chicken that’s been seasoned and cooked just right.
But here’s where it gets really good: those biscuits. We’re making drop biscuits that are so fluffy and buttery, they practically float on top of that creamy filling. No rolling, no cutting, no fuss—just scoop and bake. The result is a topping that’s crispy on the outside, tender on the inside, and soaks up just enough of that delicious filling to be absolutely perfect.
The beauty of this recipe is in how it handles. You can make the filling ahead of time and just add the biscuits when you’re ready to bake. You can assemble the whole thing and freeze it for later. Heck, you can even make extra biscuit dough and freeze it for other meals. Talk about working smarter, not harder.
Ever notice how the best comfort foods have that perfect balance of textures? This pot pie nails it—creamy filling, tender vegetables, juicy chicken, and those incredible fluffy biscuits all working together to create something that’s way more than the sum of its parts.
Ingredients That Create Magic Together
For the Chicken Filling:
- 2 lbs boneless, skinless chicken thighs, cut into 1-inch pieces
- 2 tablespoons olive oil
- 1 teaspoon salt
- ½ teaspoon black pepper
- 1 teaspoon garlic powder
- ½ teaspoon dried thyme
- ¼ teaspoon paprika
For the Vegetable Base:
- 3 tablespoons butter
- 1 large onion, diced
- 3 carrots, peeled and diced
- 3 celery stalks, diced
- 3 cloves garlic, minced
- 8 oz mushrooms, sliced
- 1 cup frozen peas
- 1 cup frozen corn
For the Creamy Sauce:
- ⅓ cup all-purpose flour
- 3 cups chicken broth (low-sodium)
- 1 cup heavy cream
- 2 tablespoons fresh parsley, chopped
- 1 tablespoon fresh thyme leaves
- 1 teaspoon salt
- ½ teaspoon black pepper
- ¼ teaspoon nutmeg
For the Fluffy Biscuits:
- 2 cups all-purpose flour
- 1 tablespoon baking powder
- 1 teaspoon salt
- 1 tablespoon sugar
- 6 tablespoons cold butter, cubed
- ¾ cup cold buttermilk
- 2 tablespoons melted butter (for brushing)
The Step-by-Step Journey to Comfort Food Perfection
Step 1: Build That Chicken Foundation
Start by seasoning your chicken pieces with salt, pepper, garlic powder, thyme, and paprika. Don’t just sprinkle—really rub those seasonings into the meat. Let it sit for about 15 minutes while you prep your vegetables.
Heat olive oil in a large, heavy-bottomed pot or Dutch oven over medium-high heat. Add the seasoned chicken and cook until it’s golden brown on all sides—about 6-8 minutes total. You’re not cooking it completely through at this stage; you’re just building flavor with that beautiful browning.
Remove the chicken to a plate and set it aside. Don’t clean the pot—all those browned bits are pure gold for flavor building.
Step 2: Create the Vegetable Symphony
In the same pot, add butter and let it melt. Add your diced onions and cook for about 3-4 minutes until they start to soften. The onions will pick up all those delicious browned bits from the chicken.
Add the carrots and celery, cooking for another 5-6 minutes until they start to tender. Toss in the minced garlic and sliced mushrooms, cooking for another 2-3 minutes until the mushrooms release their moisture and start to brown.
This is where patience pays off. Each vegetable gets added at the right time so everything finishes cooking together. Rush this step, and you’ll end up with some vegetables that are mushy and others that are still crunchy.
Step 3: The Roux Magic (Don’t Skip This)
Sprinkle the flour over your vegetables and stir constantly for about 2 minutes. This step is crucial—you’re cooking out the raw flour taste and creating the base for your creamy sauce. The mixture should look a bit pasty and coat the vegetables.
Slowly pour in the chicken broth while stirring constantly. This prevents lumps from forming. Add the broth gradually—don’t dump it all in at once. You want a smooth, lump-free base.
Bring the mixture to a simmer and cook for about 5 minutes, stirring occasionally. It should start to thicken nicely. If it seems too thick, add a bit more broth. Too thin? Let it simmer a bit longer.
Step 4: Bring It All Together
Add the browned chicken back to the pot along with any juices that accumulated on the plate. Stir in the heavy cream, frozen peas, and corn. The peas and corn will cook perfectly in the hot filling—no need to thaw them first.
Season with fresh parsley, thyme, salt, pepper, and just a pinch of nutmeg. That nutmeg might seem weird, but trust me—it adds a subtle warmth that makes people wonder what your secret ingredient is.
Let everything simmer together for about 10 minutes, stirring occasionally. The chicken should be fully cooked, the vegetables tender, and the sauce thick enough to coat a spoon. Taste and adjust seasoning as needed.
Step 5: The Biscuit Topping Game-Changer
Preheat your oven to 425°F. In a large bowl, whisk together flour, baking powder, salt, and sugar. Cut the cold butter into small cubes and add it to the flour mixture.
Using your fingers or a pastry cutter, work the butter into the flour until it resembles coarse crumbs with some pea-sized pieces of butter still visible. These butter pieces are what make the biscuits flaky and tender.
Make a well in the center and pour in the cold buttermilk. Using a fork, gently stir until the dough just comes together. Don’t overmix—lumpy is good here. Overmixing leads to tough biscuits, and nobody wants tough biscuits.
Step 6: Assembly and Baking Perfection
Transfer your hot chicken filling to a 9×13-inch baking dish or keep it in your Dutch oven if it’s oven-safe. Using a large spoon or ice cream scoop, drop dollops of biscuit dough over the filling. Don’t worry about covering every inch—the biscuits will puff up and spread as they bake.
Brush the tops of the biscuits with melted butter—this gives them that gorgeous golden color and adds extra richness.
Bake for 20-25 minutes until the biscuits are golden brown and the filling is bubbling around the edges. The biscuits should sound hollow when tapped, and the filling should be thick and creamy.
Pro Tips That Make All the Difference
The Chicken Choice
Chicken thighs are absolutely the way to go here. They stay juicier than breasts and have more flavor. Plus, they’re harder to overcook, which is crucial since they’ll continue cooking in the oven. If you insist on breasts, just watch your cooking time carefully.
Temperature Matters
Cold butter and cold buttermilk are non-negotiable for fluffy biscuits. The cold fat creates steam pockets as it melts, which is what gives you that light, airy texture. Room temperature ingredients will give you dense, heavy biscuits.
The Thickness Test
Your filling should be thick enough to support those biscuits but not so thick that it’s gluey. Think of it like a thick soup—it should coat a spoon but still be pourable. If it’s too thick, add a splash of broth. Too thin? Let it simmer uncovered for a few more minutes.
Don’t Skip the Resting
Let your pot pie rest for about 10 minutes after it comes out of the oven. This allows the filling to set up and makes serving much easier. Plus, it prevents you from burning your tongue on molten filling 🙂
Make-Ahead Magic for Busy Lives
This recipe is perfect for meal prep. You can make the filling up to 3 days ahead and store it in the fridge. When you’re ready to serve, just reheat the filling, transfer to your baking dish, add fresh biscuit dough, and bake.
You can also assemble the entire pot pie and freeze it unbaked for up to 3 months. Bake straight from frozen, adding about 15-20 extra minutes to the cooking time and covering with foil if the biscuits brown too quickly.
Individual portions work great too—divide the filling among ramekins, top with smaller biscuits, and you’ve got personal pot pies that are perfect for portion control or entertaining.
Variations That Keep Things Interesting
The Protein Swap
While chicken is classic, this recipe works beautifully with:
- Turkey (especially great for using up Thanksgiving leftovers)
- Beef (use stew meat, browned and braised until tender)
- Turkey and vegetables for a lighter version
- Leftover rotisserie chicken (shredded and added in the last few minutes)
The Vegetable Adventures
Feel free to customize the vegetable mix:
- Sweet potatoes instead of regular potatoes
- Green beans instead of peas
- Leeks instead of onions for a more sophisticated flavor
- Bell peppers for extra color and sweetness
The Topping Alternatives
Not feeling biscuits? Try these alternatives:
- Puff pastry for an elegant presentation
- Mashed potatoes for a shepherd’s pie vibe
- Cornbread topping for a Southern twist
- Herb dumplings for a more rustic feel
The Science Behind Perfect Pot Pie
Here’s what’s really happening when you make this recipe: the roux (flour and fat cooked together) creates a stable base that can hold all that liquid without breaking. The cold butter in the biscuits creates steam pockets that make them fluffy. The combination of chicken broth and cream gives you richness without being too heavy.
The key is building flavors in layers—browning the chicken, sautéing the vegetables, creating a proper roux, and seasoning at each step. Each element contributes to the final flavor profile, and skipping steps or rushing the process shows in the final dish.
Storage and Reheating Like a Pro
Leftover pot pie keeps in the fridge for up to 4 days. To reheat, cover with foil and bake at 350°F for about 20-25 minutes until heated through. The microwave works for individual portions, but the oven keeps those biscuits from getting soggy.
If you’re dealing with a whole pot pie, cut it into portions before reheating—it heats more evenly and faster. And honestly? This stuff tastes even better the next day after all the flavors have had time to meld together.
The Real Talk About Comfort Food
Look, I know this isn’t health food. But sometimes you need something that feeds your soul as much as your body. This chicken pot pie delivers comfort in a way that salads and quinoa bowls just can’t match. It’s the kind of meal that makes you slow down, gather around the table, and actually talk to each other.
The best part? It’s not just about the eating—it’s about the making. There’s something deeply satisfying about creating this kind of comforting, nourishing meal from scratch. Your kitchen smells incredible, you feel accomplished, and you end up with enough food to share or enjoy for days.
When to Make This Recipe
This pot pie shines in so many situations:
- Sunday dinners when you want something special but approachable
- Weeknight comfort when you need something that feels like a hug
- Potluck gatherings where you want to bring something that’ll disappear fast
- Meal prep when you want to set yourself up for easy dinners all week
- Using up leftovers when you have odds and ends that need a purpose
The Economics of Homemade Comfort
Making this pot pie from scratch costs a fraction of what you’d pay for a comparable dish at a restaurant. We’re talking about feeding 6-8 people for under $15, and that includes all the good stuff—real cream, quality chicken, fresh vegetables, and homemade biscuits.
Compare that to frozen pot pies from the store, and you’re not just saving money—you’re getting infinitely better quality. No preservatives, no mystery ingredients, just real food that tastes like food should taste.
The Final Verdict
This chicken pot pie with fluffy biscuits isn’t just a recipe—it’s a gateway to the kind of cooking that makes people fall in love with spending time in the kitchen. It’s approachable enough for beginners but satisfying enough for experienced cooks who want something that delivers on both flavor and comfort.
The combination of that rich, creamy filling and those impossibly fluffy biscuits creates something that’s more than the sum of its parts. It’s the kind of meal that creates memories, starts conversations, and makes people feel taken care of.
So next time you’re craving something that feels like home, remember this recipe. It might take a little time and effort, but the payoff is a dish that’ll remind you why cooking from scratch is always worth it. And who knows? You might just find yourself with a new signature dish that people will be asking you to make again and again. Trust me, once you nail this pot pie, you’ll never want to go back to the frozen stuff again!