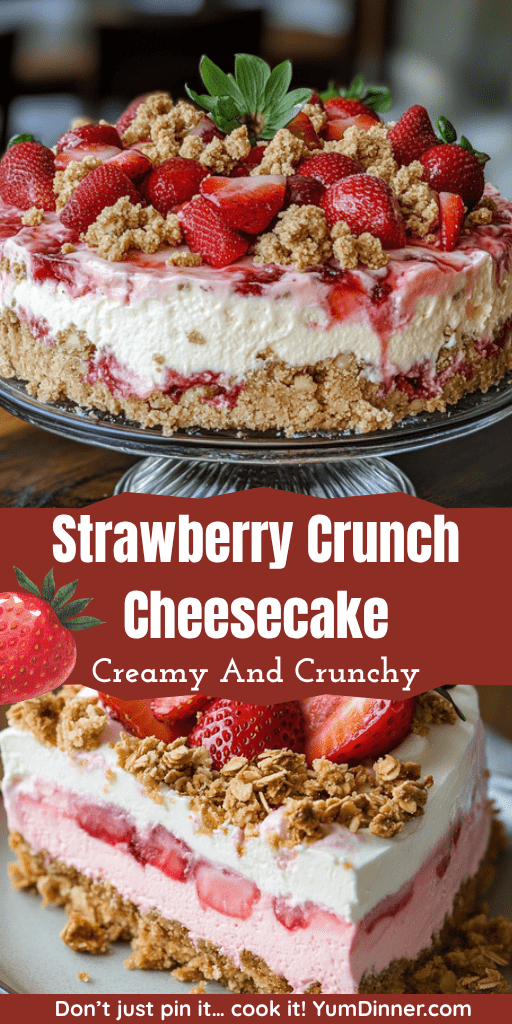
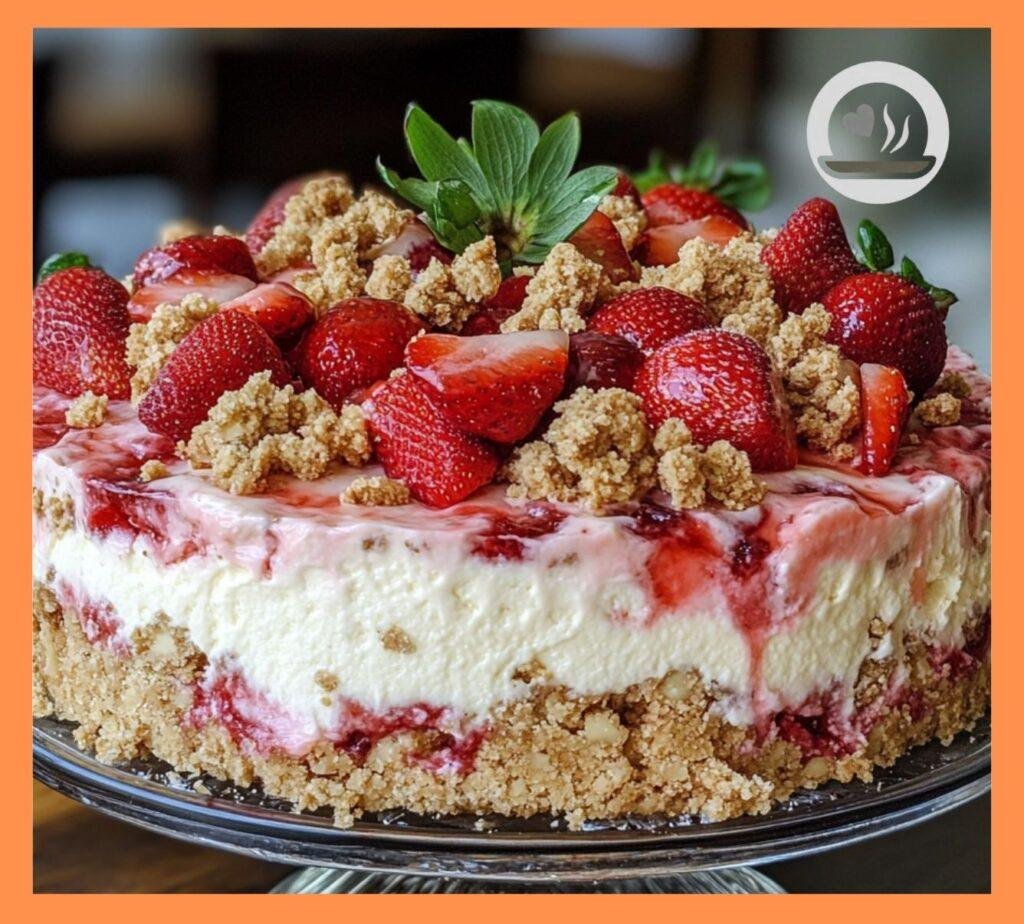
Strawberry Crunch Cheesecake – Creamy, Crunchy & Berry Delicious
Look, I’m not gonna sugarcoat this—strawberry crunch cheesecake is basically heaven on a plate. You know that moment when you bite into something so ridiculously good that you actually close your eyes and do that little happy dance? Yeah, that’s exactly what happens with this bad boy.
I stumbled upon this recipe last summer when I was desperately trying to impress my in-laws (spoiler alert: it worked), and let me tell you, it’s been my secret weapon ever since. The combination of creamy, tangy cheesecake with that iconic strawberry crunch topping? Pure genius. And the best part? It’s way easier to make than people think.
Nutrition Information
Here’s the nutritional breakdown per slice (serves 12):
| Nutrient | Amount |
| Calories | 485 |
| Total Fat | 32g |
| Saturated Fat | 19g |
| Cholesterol | 145mg |
| Sodium | 285mg |
| Total Carbohydrates | 45g |
| Dietary Fiber | 2g |
| Sugars | 38g |
| Protein | 8g |
| Vitamin C | 15mg |
| Calcium | 125mg |
Note: Nutritional values are approximate and may vary based on specific ingredients used.
What Makes This Strawberry Crunch Cheesecake So Special?
Ever wondered why some desserts just hit different? This strawberry crunch cheesecake nails it because it’s got everything your dessert-loving heart craves. The rich, velvety cheesecake base provides that luxurious mouthfeel, while the strawberry layer adds a bright, fruity punch that cuts through all that creamy richness.
But here’s where it gets really good—that crunch topping. It’s basically crushed golden sandwich cookies mixed with butter and strawberry gelatin powder. Sounds weird? Trust me on this one. It creates this amazing textural contrast that’ll have you scraping the plate clean.
I’ve made this dessert probably fifty times now (not exaggerating), and every single time, people ask for the recipe. My neighbor literally knocked on my door at 9 PM once because she “needed” to know how I made it. That’s the power we’re dealing with here.
Ingredients You’ll Need
For the Crust:
- 2 cups graham cracker crumbs
- 1/2 cup melted butter
- 1/4 cup granulated sugar
- Pinch of salt
For the Cheesecake Filling:
- 32 oz cream cheese, softened (that’s four 8oz packages)
- 1 cup granulated sugar
- 4 large eggs, room temperature
- 1 cup sour cream
- 1/4 cup heavy cream
- 2 teaspoons vanilla extract
- 1/4 teaspoon salt
For the Strawberry Layer:
- 2 cups fresh strawberries, hulled and sliced
- 1/3 cup granulated sugar
- 2 tablespoons cornstarch
- 2 tablespoons lemon juice
- 1 tablespoon water
For the Crunch Topping:
- 2 cups golden sandwich cookies, crushed (like Golden Oreos)
- 1/4 cup melted butter
- 3 tablespoons strawberry gelatin powder (the secret ingredient!)
- 2 tablespoons freeze-dried strawberries, crushed (optional but amazing)
Step-by-Step Instructions
Preparing Your Kitchen Setup
Before we jump in, let’s talk prep work. Nothing ruins a good cheesecake-making session like scrambling around for ingredients halfway through. Get everything to room temperature (seriously, this matters), preheat your oven to 325°F, and wrap the outside of your 9-inch springform pan with heavy-duty foil. Trust me, you don’t want water getting into your cheesecake during the water bath.
Making the Perfect Graham Cracker Crust
Step 1: Mix those graham cracker crumbs with melted butter, sugar, and a pinch of salt in a medium bowl. The mixture should hold together when you squeeze it—if it’s too dry, add a bit more butter.
Step 2: Press this mixture firmly into the bottom of your prepared springform pan. I like to use the bottom of a measuring cup to really pack it down. You want it even and compact, not loose and crumbly.
Step 3: Bake for 10 minutes, then set aside to cool. This pre-baking step prevents a soggy bottom—and nobody wants that 🙂
Creating the Silky Cheesecake Filling
Step 4: Here’s where patience pays off. Beat that softened cream cheese with an electric mixer until it’s completely smooth and fluffy—about 3-4 minutes. Don’t rush this part; lumpy cream cheese equals lumpy cheesecake.
Step 5: Gradually add the sugar, beating until well combined. Then add eggs one at a time, mixing just until incorporated. Overmixing leads to cracks, and we’re going for perfection here.
Step 6: Mix in the sour cream, heavy cream, vanilla, and salt until just combined. The batter should be smooth and creamy, not thick and dense.
Step 7: Pour this gorgeous mixture over your cooled crust. Give the pan a gentle tap on the counter to release any air bubbles.
The Water Bath Method (Don’t Skip This!)
Step 8: Place your foil-wrapped springform pan in a large roasting pan. Pour hot water into the roasting pan until it reaches halfway up the sides of the cheesecake pan. This water bath prevents cracking and ensures even cooking.
Step 9: Bake for 55-65 minutes, until the center is almost set but still has a slight jiggle. The edges should be set and lightly golden.
Step 10: Turn off the oven and crack the door open slightly. Let the cheesecake cool in the oven for 1 hour—this gradual cooling prevents those dreaded cracks.
Making the Strawberry Topping
Step 11: While your cheesecake cools, let’s make that strawberry layer. Combine sliced strawberries, sugar, cornstarch, lemon juice, and water in a medium saucepan.
Step 12: Cook over medium heat, stirring frequently, until the mixture thickens and the strawberries break down slightly—about 8-10 minutes. You want it jam-like but still chunky.
Step 13: Let this cool completely before spreading it over your cheesecake. Hot strawberry topping on a warm cheesecake? Recipe for disaster.
The Legendary Crunch Topping
Step 14: This is where the magic happens. Crush those golden sandwich cookies—you want some fine crumbs and some chunky pieces for texture variety.
Step 15: Mix the crushed cookies with melted butter and strawberry gelatin powder. The gelatin powder gives it that distinctive strawberry crunch flavor and that gorgeous pink color.
Step 16: If you’ve got freeze-dried strawberries, crush them up and mix them in too. They add these little pops of intense strawberry flavor that are absolutely divine.
Assembly and Final Steps
Putting It All Together
Step 17: Once your cheesecake is completely cool (and I mean completely—this usually takes about 4 hours), spread the strawberry layer evenly over the top.
Step 18: Generously sprinkle that crunch topping over the strawberry layer. Don’t be shy here—the crunch is what makes this dessert legendary.
Step 19: Refrigerate for at least 4 hours, but overnight is even better. This gives all the flavors time to meld together and the texture to set perfectly.
Pro Tips for Cheesecake Success
Temperature Control is Everything
Room temperature ingredients are crucial for a smooth, lump-free cheesecake. Cold cream cheese will never fully incorporate, no matter how long you beat it. I usually take mine out about 2-3 hours before I plan to bake.
The Toothpick Test Doesn’t Apply Here
Forget everything you know about testing doneness with desserts. A cheesecake is done when the edges are set and the center still has a slight wobble. It’ll continue cooking as it cools, so don’t overbake it.
Prevent Cracks Like a Pro
Besides the water bath and gradual cooling, here’s another trick: run a knife around the edges of the pan as soon as you take it out of the oven. This prevents the cheesecake from sticking to the sides as it cools and contracts.
Variations That’ll Blow Your Mind
Make It Extra Strawberry
Want to go full strawberry overload? Add some strawberry extract to your cheesecake filling—just a teaspoon will do. You can also swirl in some strawberry puree for a marbled effect.
Chocolate Lovers’ Version
Swap out the graham crackers for chocolate cookie crumbs in the crust. Add a layer of chocolate ganache between the cheesecake and strawberry layer. It’s basically strawberry-chocolate heaven.
Individual Mini Cheesecakes
This recipe works beautifully as individual cheesecakes too. Use a muffin tin lined with cupcake papers, reduce the baking time to 18-22 minutes, and you’ve got perfect party portions.
Storage and Serving Tips
How to Store Your Masterpiece
This cheesecake keeps beautifully in the fridge for up to 5 days. Cover it loosely with plastic wrap or foil—you don’t want to smush that gorgeous crunch topping.
For longer storage, you can freeze it for up to 3 months. Just wrap it well and thaw it slowly in the fridge overnight before serving.
Serving Like a Pro
Use a sharp knife dipped in warm water and wiped clean between each slice. This gives you clean, bakery-quality cuts that show off all those beautiful layers.
Let each slice sit at room temperature for about 10-15 minutes before serving. It tastes so much better when it’s not ice-cold straight from the fridge.
When Things Go Wrong (And How to Fix Them)
Cracked Cheesecake? No Problem
If your cheesecake cracks despite your best efforts, don’t panic. The strawberry layer and crunch topping will cover most imperfections. For major cracks, you can always make a simple sour cream topping to smooth things over.
Runny Strawberry Layer
If your strawberry topping turned out too thin, just cook it a bit longer next time. For this batch, mix a teaspoon of cornstarch with a tablespoon of cold water and stir it in—it’ll thicken up in the fridge.
Soggy Crust Issues
A soggy crust usually means the cheesecake wasn’t cool enough when you cut it, or moisture got trapped somewhere. Next time, make sure everything is completely cool and consider adding a thin layer of melted chocolate to the crust as a moisture barrier.
The Science Behind the Perfect Cheesecake
Ever wonder why cheesecakes are so finicky? It’s all about protein coagulation and moisture control. The eggs in cheesecake act as a setting agent, but they’re sensitive to temperature. Too hot, and they’ll curdle. Too fast, and they’ll create a dense, heavy texture.
The water bath serves multiple purposes: it provides gentle, even heat, adds humidity to prevent cracking, and helps maintain that creamy texture we’re after. IMO, skipping the water bath is the biggest mistake people make with cheesecake.
The sour cream adds tang and helps with the texture—it’s got less water than regular cream, so it won’t make your cheesecake runny. The heavy cream adds richness without excess liquid.
Why This Recipe Works Better Than Others
I’ve tried probably a dozen different strawberry cheesecake recipes over the years, and this one consistently produces the best results. Here’s why:
The ratios are perfect. Not too sweet, not too tangy, just balanced. The cream cheese to egg ratio gives you that perfect creamy texture without being too dense or too light.
The strawberry layer is cooked. Raw strawberries release water as they sit, which can make your cheesecake soggy. Cooking them concentrates the flavor and removes excess moisture.
That crunch topping is genius. Most strawberry cheesecakes just have plain strawberries on top. The cookie crunch adds texture and that nostalgic strawberry crunch bar flavor that takes this from good to unforgettable.
Making It Ahead for Special Occasions
This is honestly the perfect make-ahead dessert. You can make the whole thing up to 3 days in advance—it actually gets better as it sits and the flavors develop. Just add the crunch topping the day you’re serving it to keep it, well, crunchy.
For big events, I like to make two different sizes: one 9-inch for the main dessert and a few mini ones for people who want just a taste. Trust me, there’s no such thing as “just a taste” with this cheesecake, but it makes people feel better about going back for seconds.
The Final Verdict
Look, I’m not gonna lie—this isn’t a quick dessert. Between the prep time, baking, and cooling, you’re looking at most of a day. But here’s the thing: it’s almost entirely hands-off time. You’re not standing over the stove stirring constantly or babysitting anything complicated.
The payoff is absolutely worth it. This strawberry crunch cheesecake has become my signature dessert, the one people specifically request for birthdays and holidays. It’s got that perfect combination of familiar comfort and special occasion elegance.
Whether you’re trying to impress someone special, need a show-stopping dessert for a party, or just want to treat yourself to something amazing, this cheesecake delivers every single time. The creamy texture, bright strawberry flavor, and that addictive crunch topping create a dessert experience that’s honestly hard to beat.
So grab your ingredients, clear your schedule, and get ready to make something that’ll have people talking for weeks. Trust me, once you master this recipe, you’ll be the dessert hero of every gathering. And honestly? That’s not a bad reputation to have.