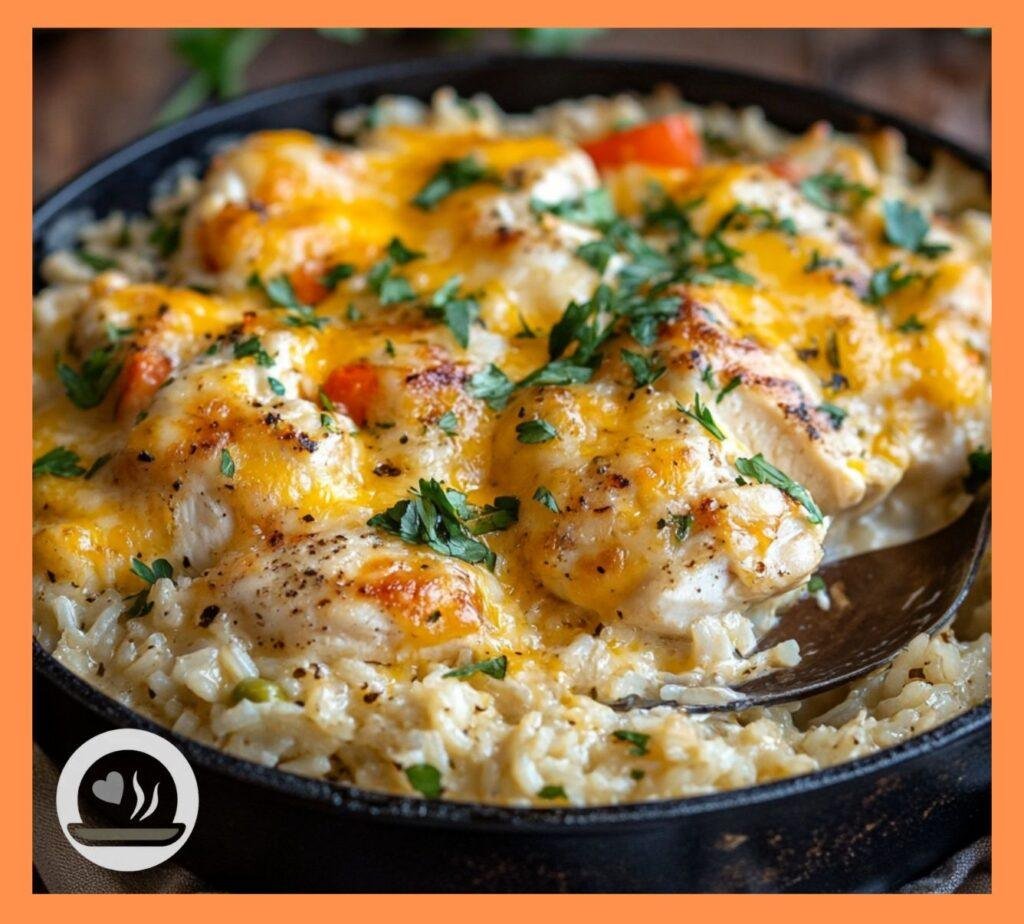
Cheesy Smothered Chicken & Rice Skillet – One-Pan Comfort Food
Let’s talk about the kind of dinner that makes you feel like you’ve got your life together, even when you absolutely don’t. This cheesy smothered chicken and rice skillet is that meal—the one that feeds your family, uses just one pan, and tastes like you spent hours in the kitchen when you really spent about 45 minutes watching Netflix while it cooked.
I stumbled onto this recipe during one of those “what’s in my fridge that needs using up” moments. You know the drill—some chicken thighs, leftover rice, random vegetables, and a block of cheese that was calling my name. What started as a desperate attempt to avoid ordering takeout became our family’s most requested weeknight dinner.

The magic happens when everything comes together in that cast iron skillet, creating layers of flavor that would make your grandmother proud. Plus, there’s something deeply satisfying about melted cheese bubbling over tender chicken and perfectly seasoned rice. It’s comfort food at its finest, and honestly, it’s foolproof enough that even my disaster-prone brother-in-law can nail it.
Nutrition Information
Here’s the nutritional breakdown per serving (makes 6 servings):
| Nutrient | Amount |
| Calories | 485 |
| Total Fat | 22g |
| Saturated Fat | 9g |
| Cholesterol | 135mg |
| Sodium | 890mg |
| Total Carbohydrates | 38g |
| Dietary Fiber | 2g |
| Sugars | 4g |
| Protein | 35g |
| Calcium | 285mg |
| Iron | 2.8mg |
| Potassium | 485mg |
Why This Skillet Recipe Rules the Kitchen
The beauty of this dish lies in its simplicity and versatility. You brown the chicken, build your flavor base, add the rice and liquid, then let the oven do the heavy lifting while you catch up on your favorite show. No babysitting required, no multiple pots to wash, and no stress about timing everything perfectly.
I use chicken thighs because they stay juicy and flavorful even if you accidentally overcook them a bit. Chicken breasts? They turn into rubber if you look at them wrong. Thighs are forgiving, budget-friendly, and packed with flavor that makes this dish sing.
Ever wonder why restaurant one-pot meals taste so much better than your attempts at home? They’re not afraid of fat and seasoning. This recipe embraces both, creating layers of flavor that build on each other throughout the cooking process.
Ingredients You’ll Need
For the Chicken:
- 2 lbs boneless, skinless chicken thighs (cut into bite-sized pieces)
- 2 tablespoons olive oil
- 1 teaspoon salt
- 1/2 teaspoon black pepper
- 1 teaspoon paprika
- 1/2 teaspoon garlic powder
- 1/2 teaspoon onion powder
For the Rice Base:
- 1 1/2 cups long-grain white rice (uncooked)
- 1 large onion, diced
- 1 bell pepper, diced (any color you prefer)
- 3 cloves garlic, minced
- 1 can (14.5 oz) diced tomatoes, drained
- 3 cups chicken broth
- 1 teaspoon dried oregano
- 1 teaspoon cumin
- 1/2 teaspoon smoked paprika
- Salt and pepper to taste
For the Cheesy Topping:
- 2 cups shredded sharp cheddar cheese
- 1 cup shredded Monterey Jack cheese
- 1/4 cup fresh cilantro, chopped
- 2 green onions, sliced
Optional Add-ins:
- 1 cup frozen corn kernels
- 1 can (4 oz) diced green chiles
- 1/2 cup sour cream for serving
The Secret to Perfect Skillet Success
The key to this recipe is building layers of flavor at each step. We’re not just throwing everything together and hoping for the best—we’re creating a foundation of taste that gets better as it cooks.
First, you brown the chicken to develop that rich, caramelized flavor. Then you sauté the vegetables in those same delicious pan drippings. Finally, you add the rice and liquid, letting everything meld together in the oven while the rice absorbs all those amazing flavors.
Step-by-Step Instructions
Step 1: Prep Your Chicken Like a Pro
Cut your chicken thighs into uniform bite-sized pieces—about 1-inch chunks work perfectly. Pat them completely dry with paper towels (moisture is the enemy of good browning), then season generously with salt, pepper, paprika, garlic powder, and onion powder.
Let the seasoned chicken sit at room temperature for about 15 minutes while you prep your other ingredients. This helps the seasoning penetrate the meat and ensures even cooking.
Step 2: Create Your Flavor Foundation
Preheat your oven to 375°F. Heat olive oil in a large oven-safe skillet or cast iron pan over medium-high heat. When the oil shimmers but doesn’t smoke, add your seasoned chicken pieces.
Here’s where patience pays off—don’t move the chicken around! Let it brown for 3-4 minutes on one side before flipping. You want those beautiful golden-brown bits that add so much flavor to the final dish. Brown all sides, then remove chicken to a plate and set aside.
Step 3: Build Your Vegetable Base
In the same skillet (don’t you dare clean it!), add diced onion and bell pepper. Cook for about 5 minutes until they start to soften and pick up those gorgeous browned bits from the chicken.
Add minced garlic and cook for another minute until fragrant. The kitchen should smell absolutely amazing at this point—if it doesn’t, you’re not using enough garlic 🙂
Step 4: Rice Integration Magic
Add your uncooked rice to the skillet and stir it around for about 2 minutes. This toasting step gives the rice a slightly nutty flavor and helps it hold its shape during cooking.
Pour in the drained diced tomatoes, chicken broth, oregano, cumin, and smoked paprika. Stir everything together, making sure to scrape up any browned bits from the bottom of the pan. Those bits are liquid gold for flavor.
Step 5: The Assembly Process
Nestle your browned chicken pieces back into the skillet, distributing them evenly throughout the rice mixture. If you’re using corn or green chiles, fold them in now.
Bring the mixture to a gentle simmer on the stovetop, then cover tightly with a lid or aluminum foil. This step ensures the rice starts cooking evenly before it goes into the oven.
Step 6: Oven Magic Time
Transfer your covered skillet to the preheated oven and bake for 25-30 minutes until the rice is tender and has absorbed most of the liquid. The exact timing depends on your rice variety and how hot your oven runs.
Check it once at the 20-minute mark—the rice should still be slightly al dente with a bit of liquid remaining. If it looks too dry, add a splash more broth.
Step 7: The Cheese Finale
Remove the skillet from the oven and uncover carefully (watch out for that steam!). Sprinkle both types of cheese evenly over the top, then return to the oven uncovered for 10-15 minutes until the cheese melts and gets slightly golden on top.
Let it rest for 5 minutes before serving—this allows the rice to finish absorbing any remaining liquid and makes serving much easier.
Pro Tips from Years of Skillet Success
Use the right pan size—a 12-inch skillet is perfect for this recipe. Too small and everything won’t fit properly, too large and the liquid evaporates too quickly.
Don’t skip the browning step for the chicken. Those caramelized bits are where the magic happens, flavor-wise.
Rice texture matters—long-grain white rice works best because it doesn’t get mushy. Avoid instant rice, which turns to mush, and be careful with brown rice, which needs longer cooking time.
Cheese variety is key—sharp cheddar gives you tang and flavor, while Monterey Jack provides that perfect melty texture. Don’t use pre-shredded cheese if you can help it—freshly grated melts so much better.
Customization Options That Actually Work
The beauty of this recipe is how easily it adapts to whatever you have on hand or whatever your family prefers:
Vegetable swaps: Try diced zucchini, mushrooms, or jalapeños instead of bell peppers Protein alternatives: Ground turkey, shrimp, or even leftover rotisserie chicken work great Spice level: Add cayenne pepper or hot sauce for heat, or keep it mild for picky eaters Cheese variations: Pepper jack for spice, or add some cream cheese for extra richness
Make-Ahead and Meal Prep Magic
This dish is perfect for meal prep or make-ahead dinners. You can assemble everything through step 5, cover tightly, and refrigerate for up to 24 hours. Just add an extra 10 minutes to the cooking time if starting from cold.
Leftovers keep beautifully in the fridge for up to 4 days and actually taste better the next day when all the flavors have had time to meld together. Reheat in the microwave with a splash of broth to keep it from drying out.
Troubleshooting Common Issues
Rice Comes Out Crunchy
This usually means not enough liquid or too high oven temperature. Add more broth and cover tightly, then continue cooking until tender.
Everything Gets Mushy
Too much liquid or cooking too long. Next time, reduce the broth slightly and check earlier in the cooking process.
Chicken Turns Out Dry
You probably used chicken breasts instead of thighs, or overcooked them. Thighs are much more forgiving and stay juicy.
Cheese Gets Rubbery
Overcooking the cheese or using pre-shredded cheese can cause this. Freshly grated cheese melts much better.
Serving Suggestions That Complete the Meal
This skillet is pretty much a complete meal on its own, but these sides take it to the next level:
Simple green salad with lime vinaigrette to cut through the richness Warm flour tortillas for making impromptu tacos Sliced avocado and a dollop of sour cream Pickled jalapeños for those who like a little heat
FYI, this also makes incredible leftovers stuffed into burritos or quesadillas the next day.
The Economics of Comfort Food
Making this skillet dinner costs about $2.50 per serving compared to $12+ for similar portions at restaurants. Plus, you get enough leftovers for lunch the next day, making it an incredibly budget-friendly option for families.
I usually buy chicken thighs in bulk when they’re on sale and freeze them in meal-sized portions. Having the components ready to go makes this an even easier weeknight option.
Storage and Reheating Wisdom
Store leftovers in airtight containers in the fridge for up to 4 days. The rice continues to absorb flavors, making day-two portions even more delicious.
To reheat, add a splash of chicken broth or water to prevent drying out. Microwave in 30-second intervals, stirring between, or reheat in a covered pan on the stovetop over low heat.
This also freezes well for up to 3 months. Thaw overnight in the fridge before reheating.
The Science Behind the Perfect Skillet
The combination of browning, sautéing, and braising creates multiple layers of flavor that you just can’t get from simpler cooking methods. The chicken releases its juices, the vegetables caramelize, and the rice absorbs all those amazing flavors while staying perfectly tender.
The cheese on top creates a protective layer that keeps everything moist while adding that irresistible golden, bubbly finish that makes this dish Instagram-worthy.
When Everything Goes Right
There’s something deeply satisfying about pulling this skillet out of the oven when everything has come together perfectly. The cheese is golden and bubbly, the rice is tender and flavorful, and the chicken is juicy and perfectly seasoned.
The best part? Watching your family dig in with enthusiasm, knowing you’ve created something special without breaking a sweat. It’s the kind of meal that makes you feel like a kitchen rockstar, even on your most chaotic days.
Final Thoughts on Skillet Success
This cheesy smothered chicken and rice skillet isn’t just dinner—it’s a stress-relief system disguised as comfort food. It’s the answer to those nights when you need something satisfying, filling, and foolproof.
Sure, it’s not the fanciest meal you’ll ever make, but it’s reliable, delicious, and adaptable to whatever you have on hand. Sometimes that’s exactly what you need—a recipe that works every single time and tastes like a warm hug on a plate.
So grab that skillet, heat up the oven, and get ready to create some seriously satisfying comfort food. Just don’t be surprised when this becomes your go-to recipe for busy weeknights, potluck dinners, and any time you need to feed people without losing your sanity :/
Trust me, your future self will thank you for having this recipe in your back pocket!