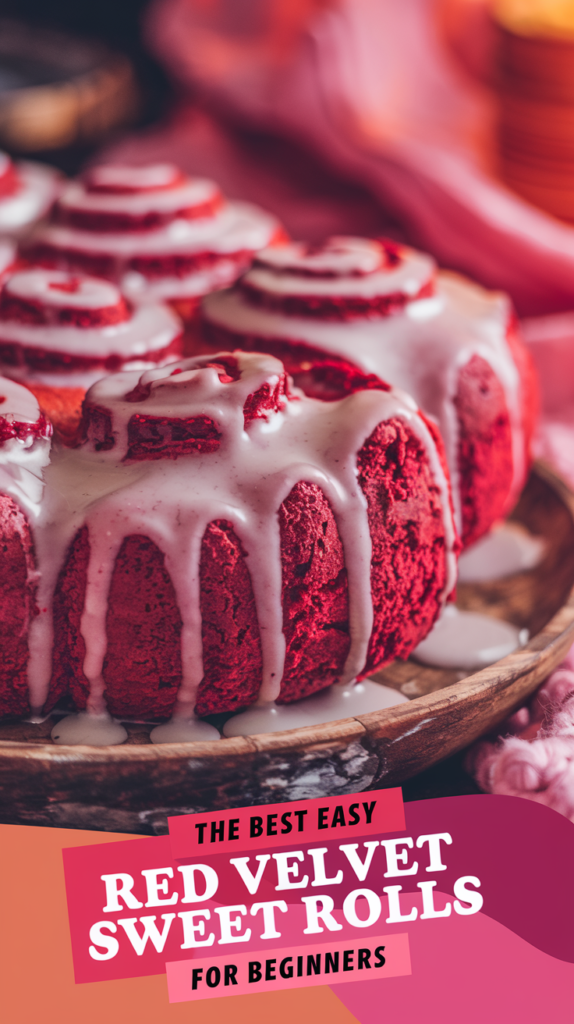
The Best Easy Red Velvet Sweet Rolls Recipe for Beginners
Red Velvet Sweet Rolls are a delightful twist on the classic red velvet cake, transforming it into a fluffy, sweet treat perfect for breakfast or dessert. With their vibrant color and a rich cream cheese frosting, these rolls are not only visually stunning but also irresistibly delicious.
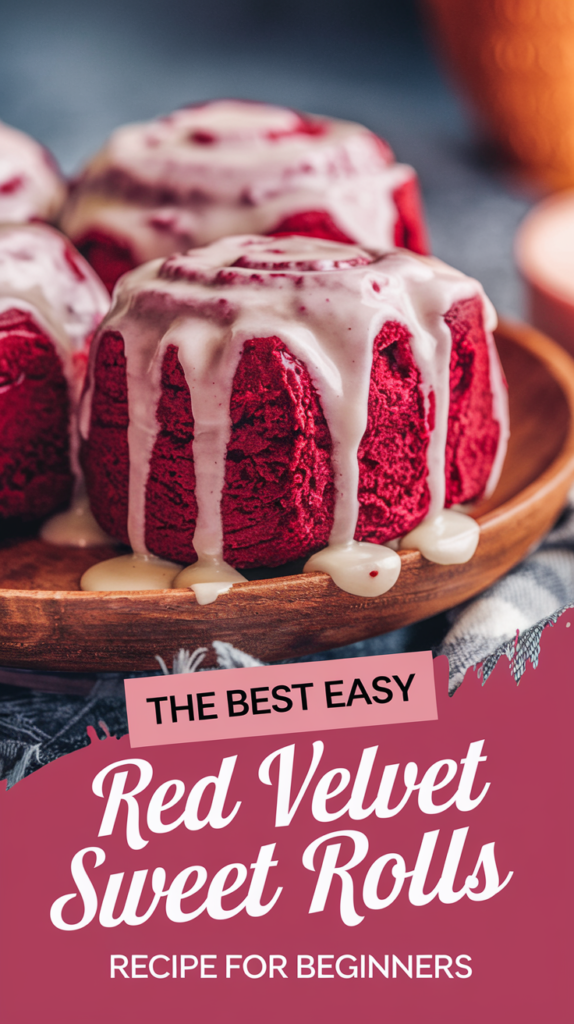
Ideal for special occasions or simply to brighten up your day, these easy-to-follow rolls will impress your family and friends, making them a must-try recipe for beginners!
Perfect Pairing
- Pair with a cup of coffee or tea for a delightful breakfast.
- Serve as a dessert alongside vanilla ice cream for an indulgent treat.
Occasions to Serve
- Valentine’s Day celebrations.
- Birthdays and special events.
- Brunch gatherings with family and friends.
Recipe Overview
- Servings: 12 rolls
- Prep Time: 30 minutes
- Cook Time: 25 minutes
- Total Time: 55 minutes (plus rising time)
- Calories: Approximately 300 per roll
Nutrition Information
- Calories: 300 kcal
- Fat: 12 g
- Carbohydrates: 45 g
- Protein: 4 g
- Sugar: 20 g
- Sodium: 250 mg
Cook and Prep Times
- Preparation Time: 30 minutes
- Rising Time: 1 hour
- Cooking Time: 25 minutes
- Total Time: 55 minutes (not including rising time)
Cooking Techniques: Mastering Red Velvet Sweet Rolls
1. Achieving the Perfect Dough Texture
The foundation of any great sweet roll is the dough. Use warm milk (about 110°F/43°C) to activate the yeast, ensuring it foams before mixing with flour, sugar, eggs, and butter. Knead the dough until smooth and elastic—this develops gluten, which gives the rolls structure while staying soft and pillowy.
2. Infusing Flavor with Cocoa and Food Coloring
To achieve the signature red velvet flavor, use a small amount of unsweetened cocoa powder for a subtle chocolate undertone. Add red food coloring gradually, mixing until you reach the desired vibrant hue. For a natural alternative, beet juice or pureed beets can provide a reddish tint without artificial coloring.
3. Rolling and Filling with Precision
Roll out the dough evenly into a rectangle to ensure consistent thickness. Spread the filling—a mixture of softened butter, brown sugar, and cocoa powder—evenly across the surface, leaving a slight border around the edges. Roll the dough tightly from one long side to the other, then slice into even pieces using a sharp knife or dental floss for clean cuts.
4. Proofing for Fluffy Rolls
Allow the shaped rolls to proof in a warm, draft-free environment until they double in size. This step is crucial for achieving light, airy texture. If your kitchen is cool, place the rolls in a slightly warmed oven (turned off) with a bowl of hot water nearby to create humidity.
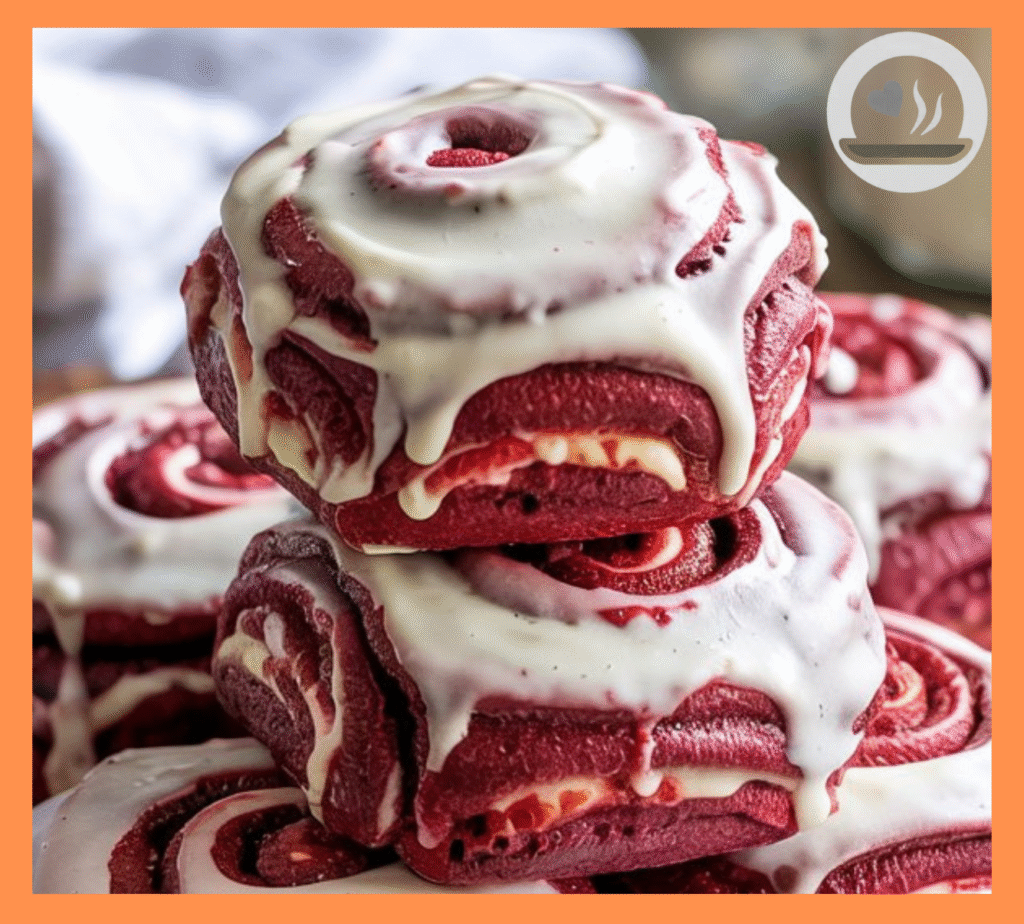
5. Crafting a Cream Cheese Glaze
For the classic red velvet pairing, make a tangy cream cheese glaze by beating softened cream cheese with powdered sugar, vanilla extract, and a splash of milk. Drizzle the glaze over the warm rolls for a glossy finish that melts slightly into the layers.
6. Baking for Golden Perfection
Bake the rolls in a preheated oven at 350°F–375°F (175°C–190°C) until golden brown and cooked through. Rotate the pan halfway through baking to ensure even browning. Avoid overbaking, as this can dry out the rolls.
By mastering these techniques, you’ll not only create decadent Red Velvet Sweet Rolls but also develop skills that can be applied to other sweet roll recipes. Whether you’re working with yeast, rolling dough, or crafting fillings, these principles will elevate your baking game.
Ingredients List
For the Sweet Rolls
- 2 ¾ cups all-purpose flour
- 1 cup milk, warmed
- ¼ cup granulated sugar
- 1 packet (2 ¼ teaspoons) active dry yeast
- 1 large egg
- ¼ cup unsalted butter, melted
- 1 tablespoon cocoa powder
- 1 teaspoon vanilla extract
- 1 teaspoon red food coloring
- ½ teaspoon salt
For the Cream Cheese Frosting
- 4 oz cream cheese, softened
- ¼ cup unsalted butter, softened
- 1 teaspoon vanilla extract
- 2 cups powdered sugar
- 1-2 tablespoons milk (to achieve desired consistency)
Step-by-Step Instructions
- Prepare the Dough: In a small bowl, combine warm milk, sugar, and yeast. Let it sit for 5-10 minutes until frothy. In a large bowl, mix flour, cocoa powder, and salt.
- Combine Ingredients: Add the milk mixture, melted butter, egg, red food coloring, and vanilla extract to the dry ingredients. Mix until a dough forms.
- Knead the Dough: Transfer the dough to a floured surface and knead for about 5-7 minutes until smooth. Place it in a greased bowl, cover, and let it rise for 1 hour in a warm place.
- Roll and Cut: After rising, punch down the dough and roll it out into a rectangle about ¼ inch thick. Spread softened butter over the dough, then sprinkle with sugar and cinnamon.
- Shape the Rolls: Roll the dough tightly into a log and cut into 12 equal pieces. Place the rolls in a greased baking dish, cover, and let them rise for another 30 minutes.
- Bake the Rolls: Preheat your oven to 350°F (175°C). Bake the rolls for 20-25 minutes until golden. Let them cool slightly.
- Make the Frosting: In a bowl, beat together cream cheese, butter, and vanilla until smooth. Gradually add powdered sugar and mix until fluffy. Add milk as needed for desired consistency.
- Frost and Serve: Spread the cream cheese frosting over the warm rolls and enjoy!
Tips for Success
- Ensure your milk is warm but not hot to activate the yeast properly.
- For fluffier rolls, allow sufficient rising time for the dough.
- Experiment with adding chocolate chips or nuts for extra flavor.
Troubleshooting Common Issues
- Dough Not Rising: Ensure your yeast is fresh and that the milk is warm enough (about 110°F).
- Rolls Too Dense: Knead the dough thoroughly and allow enough rising time to develop airiness.
- Frosting Too Runny: Add more powdered sugar to thicken or reduce the amount of milk.
Frequently Asked Questions
- Can I use a different frosting? Yes! You can use buttercream or glaze instead of cream cheese frosting.
- Can I make these rolls ahead of time? Yes, you can prepare the dough and refrigerate it overnight before rolling it out.
- What if I don’t have red food coloring? You can leave it out, but the rolls will not have the classic red color.
- Can I freeze these rolls? Yes, you can freeze the baked rolls without frosting. Reheat before serving.
- How do I store leftovers? Keep them in an airtight container at room temperature for up to 2 days or refrigerate for up to a week.
The Story Behind Red Velvet Sweet Rolls
A Fusion of Classic Flavors and Sweet Indulgence
Red velvet cake has long been a favorite for its rich cocoa flavor, vibrant color, and creamy frosting. Its origins trace back to the early 20th century, with its iconic red hue originally achieved through natural reactions between cocoa and acidic ingredients like buttermilk. The Red Velvet Sweet Rolls take this beloved dessert and reimagine it as a breakfast or brunch treat, combining the flavors of red velvet with the comforting warmth of cinnamon rolls.
Reinventing Tradition with Sweet Rolls
The Red Velvet Sweet Rolls blend the sophistication of red velvet cake with the gooey, pull-apart delight of sweet rolls. By incorporating cocoa, red coloring, and a luscious cream cheese glaze, this dish bridges the gap between dessert and breakfast. It’s a playful yet indulgent creation that feels both nostalgic and innovative.
Why This Dish Rocks
This dish continues to captivate us because it’s versatile and indulgent. Whether served as a holiday treat, a romantic breakfast, or a celebratory centerpiece, Red Velvet Sweet Rolls offer endless possibilities while remaining deeply satisfying. Their combination of vibrant color, rich flavors, and tender texture makes them a show-stopping addition to any table.
So the next time you bite into these Red Velvet Sweet Rolls , take a moment to appreciate their ingenuity. From humble beginnings to bold reinvention, this dish truly is a testament to the power of creativity in the kitchen.
Making Red Velvet Sweet Rolls is a delightful way to indulge in a classic flavor while enjoying a fun, sweet treat. These rolls are easy to prepare and perfect for any occasion. With their stunning appearance and delicious taste, they are sure to become a favorite in your baking repertoire. So gather your ingredients and start rolling!